Showing posts with label Sauces. Show all posts

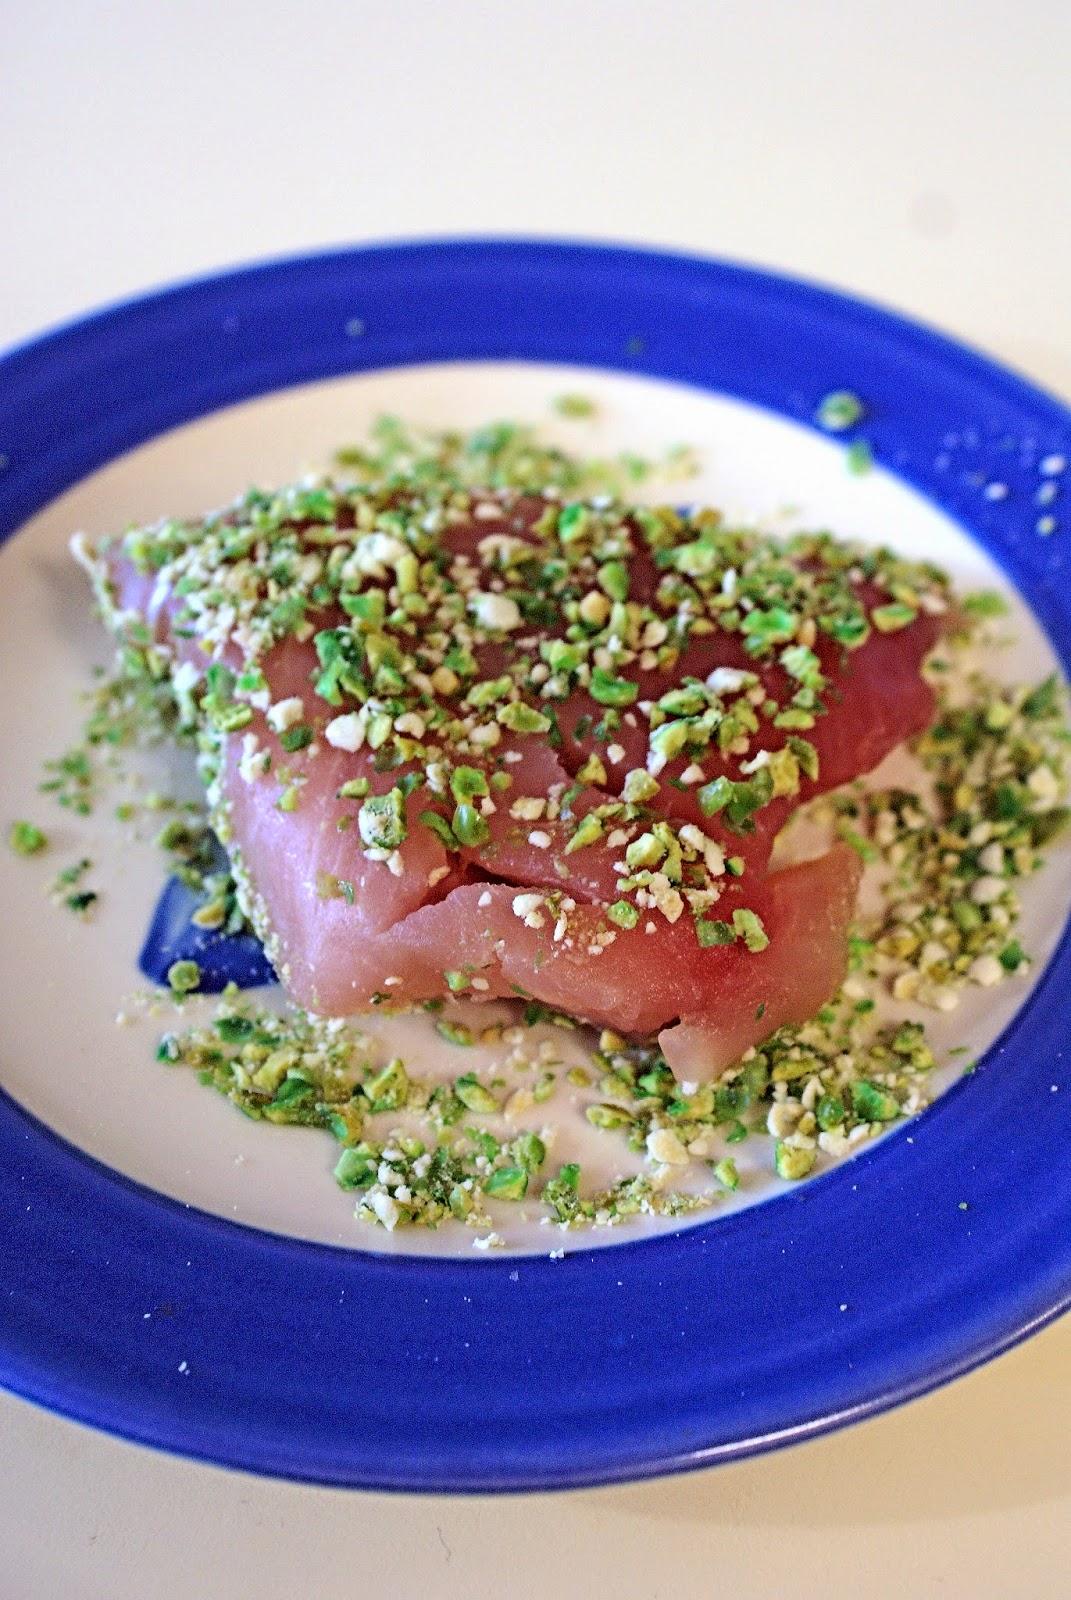
Seared Ahi Tuna with Wasabi Pea Crust

>> Friday, September 22, 2017


Seared Ahi Tuna with Wasabi Pea Crust


The week before Valentine's Day, I started developing a menu that would surprise Joe, stretch my cooking repertoire, be as healthy as possible, and use up a lot of items in our pantry and freezer as part of our yearly spring cleaning. I made seven courses in the classic French tradition, where the salad is served after the main course. The fish course featured these seared tuna steaks with a crunchy wasabi-pea crust.
Seared Ahi Tuna with Wasabi Pea Crust


We have made this several times since then. Ahi is a low -fat, high-protein meat, and flash-frozen fish fillets tasted just as good in this recipe as high-priced fresh ahi tuna. This is also extremely quick to make, so be sure everything's ready to go before you start cooking.


Ingredients

For the tuna
3 3-4 oz. ahi tuna steaks
2/3 cup wasabi peas - you can often find these in the snack section of an Asian aisle
1 tbsp canola oil

For wasabi-ginger sauce
1 clove garlic, minced
1 tbsp finely grated fresh ginger (about 1 inch)
1/2 tsp red pepper flakes (more or less to taste)
1 1/2 tsp wasabi paste (or wasabi powder mixed with 1/4 tsp water)
1/4 cup rice wine vinegar
3 tbsp soy sauce
2 tsp sesame oil
1 tbsp light molasses (or light brown sugar mixed with 1 tsp water)

Instructions

Let tuna fillets dry on paper towels - the more moisture you absorb, the easier it will be to sear them without moisture seeping out and poaching them instead. This will also ensure they don't soak up much oil.

Put all the sauce ingredients in a blender or food processor and pulse until smooth. Keep at room temperature until ready to serve.

Crush the wasabi peas in a blender, or coffee grinder. You can also put them in a plastic bag and crush them by rolling a rolling pin over them. When you're done, they should be the texture of coarse crumbs. Spread the peas onto a plate.

Heat a wide skillet on medium-high, then add the oil. Press the tuna fillets into the wasabi peas until coated on both sides. When the oil shimmers, place the fish in the pan and make sure they aren't touching each other.

Cook until there's a good sear on one side, then flip over and sear the other side for a minute or so.  You want the sear to be about a millimeter deep, and the center rare at room temperature

That's it! We like to serve them by slicing them across the grain, sort of like a slice of sashimi at a fancy restaurant. This shows the gorgeous contrast between that pretty ruby flesh and the bright green pea crust. 

Serves 4.

Read more...

Carrot Romesco Sauce

>> Monday, July 11, 2016


Carrot Romesco Sauce


This carrot romesco sauce came straight from Bon Appetit, and we used it as a sauce for a luscious roasted pork loin, as the editors suggested. We seem to have gotten all kinds of photos during the romesco-making part of the evening, and none of the pork. Oh well.

In fact, you don't even need to use this as a sweet-salty and unusual sauce for pork. We made scads of this (that's right, scads) and used it for a veggie dip and bruschetta topping, too.

If you're new to romesco sauce, Bon Appetit describes it as being to Spanish cooking what pesto is to Italian cooking. It finishes as a thick paste, and if we hadn't been busy slathering on to everything we ate that week, we would have planned ahead and tossed it with some pasta. Analogies give one all kinds of ideas, don't they?

Ingredients

¼ cup pine nuts or chopped pecans
1½ pounds carrots, peeled and cut lengthwise into quarters
1/4 cup olive oil, divided
Salt and black pepper to taste
½ tsp. crushed red pepper flakes
1 garlic clove, minced
2 tablespoons red wine vinegar, divided
1 tsp marjoram, minced

Instructions

Preheat oven to 450°.

Toast nuts in a small skilled for a few minutes, until slightly browned and fragrant. Let cool.


carrot romesco sauce


Spread half the oil on a baking sheet, then arrange the carrots on the sheet. Sprinkle with salt and pepper. Roast until tender and slightly browned, about 15 minutes. Let cool.


carrot romesco sauce


Place all ingredients in a food processor or blender, along with 1 tbsp of water. Process until it forms a thick paste, scraping down the sides occasionally and adding more water if necessary.

While spreading this on thick slices of juicy pork loin is optional, I recommend it highly. Or spread it on toast rounds and place under the broiler until bubbly. Or toss with a green salad and more wine vinegar. Or...?

Makes about 2 cups of sauce.

Read more...

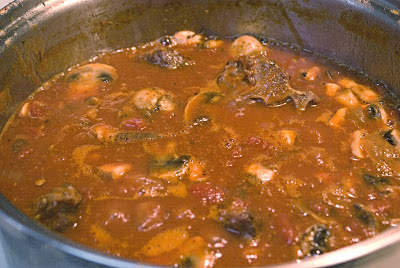
Italian Sunday Gravy

>> Saturday, March 26, 2016


Italian Sunday Gravy


If you've spent any time around big Italian-American families, you've probably had the pleasure of tasting a thick, meaty Sunday gravy - the end-of-the-week belly-busting dinner that fortifies family and friends for the week ahead. Joe was blessed to know a wonderful cook, Florence, who was Danish but married into an Italian family. From her he learned to make the best Sunday gravy we've ever tasted.

This tomato and meat sauce takes a while to make, but it also makes enough to feed all of the Jersey Shore, or enough extra to freeze for quick weekday meals. Once I start smelling the opera of aromas while it's cooking, I'm nipping off to the kitchen to snatch a little shred of pork here and there when Joe's not looking - it's that tempting.

Next time we make this, you're ALL invited over to dinner. We love nothing better than a crowd around our dinner table.

Ingredients

2 tbsp olive oil
1/2 tsp crushed red pepper flakes (or to taste - Joe likes more)
2 cups onion, chopped
1 cup carrots, peeled and chopped
1 cup celery, chopped
2 cups sliced mushrooms
8 cloves of garlic, minced fine or pressed
2 lb pork neck bones
1 lb Italian sausage (or turkey Italian sausage) in casing
2 64 oz cans of diced roma tomatoes
1 6 oz can of Italian tomato paste
4 cups homemade stock - beef, chicken, or vegetable
2 tbsp fresh oregano, chopped
2 tbsp fresh basil, chopped
1 tbsp fresh rosemary, chopped
2 tsp crushed dried sage leaves
Salt and pepper to taste
1 cup good dry red wine (more if sauce is too thick)

1 16 oz box of pasta, such as rotini or farfalle (spaghetti is fine also)
1/4 cup fresh grated Pecorino Romano cheese or good Parmesan

Directions

Heat a large Dutch oven or heavy stock pot over medium low heat. Add the olive oil and heat until shimmering, about 1 minute. Stir in the crushed red pepper flakes and heat in olive oil for about 1 minute to release the flavor and aroma. (Hot pepper oil can be used instead if it is made ahead.) Toss in onions, carrots, mushrooms and celery; saute until tender. Mix in the minced/pressed garlic cloves and saute for another 2 minutes.

Increase the heat to medium high, and add the pork neck bones, stirring occasionally. Cook evenly for about 8 to 10 minutes until just beginning to brown and cooked through. Pour in the chopped tomatoes with juice, and the stock. Stir in the tomato paste. Add the herbs, salt, pepper, and sugar. Stir in the dry red wine. Bring to a very low boil and reduce heat to low, simmering for 1 hour. Stir occasionally.

Italian Sunday Gravy


After 1 hour add the Italian sausage in casings. Stir and simmer for another 1 to 1 1/2 hours (or longer if you like - Joe has cooked this all day sometimes) checking for thickness as it simmers. If the sauce is too thin add more tomato paste, if it is too thick add some more red wine or stock.

Remove the pork neck bones and Italian sausage links onto separate warm platters. Serve the Italian Sunday Gravy over pasta and the Italian sausage links on the side. Sprinkle with fresh grated Pecorino Romano cheese. Joe likes the neck bones for the tender meat that is on the bones. That is his meat course with a plate of pasta with the gravy.

Serves 8.

Read more...

Replay: Apple-Cranberry-Currant relish

>> Monday, November 23, 2015


cranberry and apple sauce


We're delighted every time the family asks us to bring cranberry sauce for Thanksgiving. While the can of cranberry sauce is part of our tradition - and my brother-in-law's father once carved one into the shape of a turkey - this recipe from my friend Becky is the best I've ever tasted. I know it sounds weird to add an onion and curry powder, but trust me, it is amazing once it's cooked!

We're headed to the Toledo area to spend Thanksgiving with my parents, and this aromatic relish of cranberries, apples, and dried currants is going with us.

Check out the best cranberry sauce ever: Apple-Cranberry-Currant relish

Hint: if you're looking for currants and don't find them with the other dried fruits, look for a store with a Polish/Ukrainian/Russian food section. Or a Scandinavian section. Look for an aisle for people who live in cold places, basically.

Read more...

Replay: Salsa Verde and Spicy Black Bean Dip

>> Thursday, July 16, 2015


Tomatillo-Jalapeno salsa (salsa verde)


One of the very first recipes we blogged, and one of the first Mexican foods I learned to make, was salsa verde. And last weekend, when we were preparing for the opening night of my artist show in Wisconsin, Joe decided to cook up a big batch of this green tomatillo salso for the guests. They ate it all, and practically licked the bowl!

Lemon Street Gallery WI, Angela Duea and Becky Stahr, artists
With my friend Becky, and my art behind us on the wall!

I'm thrilled that nearly 200 people came to Lemon Street Gallery for the reception. Two other artists were featured - a sculptor and an acrylic painter. I'm also thrilled that I sold three pieces!

Angela Williams Duea Art
These two pieces are still for sale.

For the show, Joe also made his Light and Spicy Black Bean Dip. It was devoured, too. I only got a taste while he was making it!

Light and Spicy Black Bean Dip


Joe left out cards for our Hungry Lovers food blog so that people could try the recipes for themselves if they liked it. While I'm very last re-posting these recipes, I'm hoping the art lovers aren't too disappointed. Here, then, is how to make Salsa Verde.


Read more...

Maple-Fig Preserves

>> Tuesday, November 18, 2014


Maple-Fig Preserves


We ate fresh figs for the first time when we arrived at an agritourismo in Tuscany - a working farm with a bed-and-breakfast style accommodations.  The hosts had prepared an enormous five-course dinner, but on the sideboard sat a simple basket, lined with giant fig leaves, full of pale green figs.


Rosa dei Venti agritourismo, Tuscany
Rosa dei Venti, Creti, Italy

Joe picked up a fig and sliced it. We were enchanted by the simple flavor and crunch of the tiny seeds. Fruit in Italy is astoundingly better than fruit I've tasted anywhere else - and I grew up in the fruit-growing area of Southwestern Michigan.

We rarely see fresh figs in the Chicago area, and when we do they are too expensive to contemplate. Dried figs are a good alternative to make jam. I've been wanting to make this ever since I started to notice fig jam as a condiment on antipasto platters, alongside a selection of dessert cheeses, and as a sauce for pork and game.

I think this would also be wonderful poured over a round of brie and topped with chopped walnuts before heating. (Update: we tried this at Thanksgiving, warmed and poured over cream cheese and topped with pecans. Everybody raved about it, and there were no leftovers.)

Since this is my last week working with wonderful friends in my library, I brought in this jam with crackers last night, along with jars of Roasted Poblano salsa and Green Tomatillo salsa. They seemed to like it! It was nice being able to give them a going-away present; they are some of the friendliest, most helpful people I've ever worked with. I'm trying to hold back tears every time I say goodbye to another friend there.

Ingredients

16 oz. dried figs
2 cups boiling water
1 cup lemon juice
1 cup maple syrup
2 tbsp ground coriander
2 tsp nutmeg
1 tbsp vanilla
2 tsp salt

Instructions

Place the figs in a bowl and pour the boiling water over them. Let them soak 15-20 minutes, or until plump and tender.

Drain the figs, pouring the water into a pan. Set the fruit aside. Add the remaining ingredients to the water, and bring to a boil. Reduce heat, and simmer 5 minutes.

While the syrup is simmering, finely chop the fruit. Add it to the syrup and stir well. Continue simmering 30-45 minutes, or until very thick. Check whether the jam is set by pouring a little onto a cold plate. If it sets, it is ready. You can pour the jam into a jar and keep it in the refrigerator for 2-3 weeks, or follow the canning process below to keep it longer.

If you plan to can the jam, ladle it into sterilized 1/2 pint or pint jars, leaving 1/4 inch headspace. Wipe the rims, then screw on the lids. Process for 15 minutes in a boiling water bath, then allow to cool before checking the seals.

Makes about 4 cups of jam.

The Complete Guide to Food Preservation
You can find other canning and preserving recipes in my book, The Complete Guide to Food Preservation: Step-by-step Instructions on How to Freeze, Dry, Can, and Preserve Food

Read more...

Tri-Tip Steak Marinade

>> Thursday, November 6, 2014


Tri-Tip Steak Marinade


Who wants steak? We do, we do! Joe whipped up this marinade when we were looking for something interesting and new to do with steak before we slapped it on a hot grill. A tri-tip steak has a lot of flavor and is fairly cheap, but it can be a little firmer than a butter-soft strip or sirloin. The herbs and vinegar in this marinade helps to tenderize the meat while giving it a great burst of flavor.

Joe grills year-round, sometimes with an umbrella or windbreak over the grill, though our balcony has a wonderfully wide overhang that protects us from everything but the most horizontal wind. Extreme cold doesn't faze him! Dedicated man, and I'm thankful.


The triangle-shaped tri-tip is sometimes called a California cut, "Santa Maria steak", or "Newport Cut", depending on your region. In Europe, it might be called aiguillette baronne, Bürgermeisterstück, or rabillo de cadera. It's also a traditional cut in the Argentine asado buffet of grilled meats.

This is also good on the trendy hanger steak or flank steak cut, but thankfully the tri-tip is slightly less trendy, and therefore a lot more affordable!

Ingredients

4 tbsp olive oil
3 tbsp red wine vinegar
2 tsp fresh oregano, chopped
2 tsp fresh parsley
1 tsp rosemary
2 garlic cloves, minced
1 tsp dry mustard

Salt and pepper to taste

Directions

Whisk together all ingredients, then pour over 1/2 to 2 pounds of tri-tip or other beef steak. Let marinate for 30-90 minutes before grilling as usual.

Serves 4-6.

Read more...

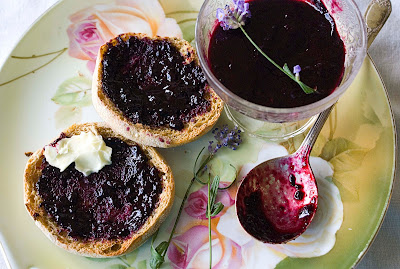
Wild Berry Lavender Jam

>> Tuesday, July 15, 2014


blueberry and blackberry jam with lavender


Last weekend when Joe and I went for a walk in the woods, we found wild blackberry vines studded with fresh berries. I'd been out the week before collecting wildflowers, and I expected the berries would be ready soon. This time, I came to the nature preserve with a couple of plastic bags to bring home the fruit.


Wildflowers from the nature preserve - colored pencil drawing.


Thankfully, we were coated with a strong layer of insect repellent. The mosquitoes are fierce and heavy this summer; in some thickets we could hardly breathe through the fog of flying bugs. Nonetheless, the berries were delicious and worth the threat to life and limb.

Those we didn't eat immediately we stirred together with some blueberries and made this fragrant, floral-tinged jam.

Wild berry lavender jam


Ingredients

Juice of three limes (about 1/2 cup)
1/3 cup hot water
2 tsp powdered pectin
3 tablespoons lavender buds and leaves
4 cups fresh blackberries
4 cups fresh blueberries
4 cups sugar

Directions

In a large non-reactive saucepan, stir together the water, lime juice, and pectin.

Put the lavender, berries, and sugar in a blender or food processor and pulse until mixed but still slightly lumpy. Add to the saucepan and mix well. Bring the jam to a boil, reduce heat, and simmer on low, stirring frequently, for 15 minutes.

Check to see if the jam is setting by dropping a bit onto a plate and letting it cool for a few minutes. The jam is set when you can tilt the plate sideways and the jam does not slide off the plate.

Sterilize half-pint jars and lids. Heat water in a boiling-water canner until it is at a rolling boil. If you don't like seeds, strain the jam through cheesecloth before putting it in jars. Then fill sterilized jars with the fruit mixture, leaving 1/2" room from the rim. Wipe off the rims and screw down the lids until finger-tight.

Boil in a hot-water bath for 15 minutes. Remove from boiler and cool on a towel. Tighten the lids before storing.

Makes about 8 half pint jars.

The Complete Guide to Food Preservation
You can find other canning and preserving recipes in my book, The Complete Guide to Food Preservation: Step-by-step Instructions on How to Freeze, Dry, Can, and Preserve Food

Read more...

Sheilja's Cilantro/Mint Chutney (Pudina)

>> Friday, June 21, 2013


Sheilja's Cilantro/Mint Chutney


This is that fresh and light chutney, sometimes called pudina, that they serve in many Indian restaurants. It can be made right before serving and used as as a dip (we love it with Indian naan, samosas and pakoras) or drizzled over meats before cooking. This also makes an excellent marinade for lamb, chicken, or fish.

We made it only slightly hot because I am a bit of a wimp when it comes to very spicy foods. The chiles used in this recipe are the tiny green spice torpedoes that are smaller than a pinky finger; add more if you like more heat. Be sure to use gloves when you chop them up.

I recently learned that chutney is a word that can be used for all kinds of sauces and condiments. Some are smooth and liquid like this one, some are dry or chunky or preserved. It's similar to all those salsas in Latin American cuisine. Now we have a whole new genre of sauces yet to try!

Yesterday, Sheilja and I went to Devon Avenue on the north side of Chicago, where there is a large population of people from all over India. We checked out the stunningly beautiful saris and jewelry; one shopkeeper invited me to try on a wedding sari, but I was too focused on lunch. The jewelry is 24-carat gold and is a form of insurance or financial security for some Indian women. I didn't see any price tags on the jewelry, so you know what that means! The dresses were between $400 and $1500.


After lunch at a vegetarian Punjabi restaurant, we went shopping at a couple of Indian, Pakistani, and Middle Eastern grocery stores. Sheilja helped me find some yellow lentils (mung daal), fresh flat-bread chappatis, mango pulp for smoothies, and tandoori paste. There are some delicious meals in our future.


Ingredients

3 Cups chopped fresh mint (we used spearmint but peppermint is best)
3 cups chopped fresh cilantro 
2 small Green Chiles, finely chopped 
2 tsp Garam Masala
1 garlic clove, minced
2 tsp Salt (or to taste)
1/3 cup fresh lemon Juice
1/4 cup water
1 tbsp olive oil

Directions

Blend all ingredients in a blender or food processor until smooth.

Makes 2 cups.

Sheilja says, "After the chutney is done, I add 2-4 Tablespoons of plain yogurt to a small amount in a separate bowl.  This gives it the light green color to it and makes it milder for the kids to be able to eat it."

Read more...

5 Fabulous Steak Marinades and Toppers

>> Wednesday, June 12, 2013


Rib eye steak


Birthdays in our home are a big deal, and always have been. When I was a little girl, my mom would cook our favorite dinner for our birthdays. Back then it was often her fried chicken, but nowadays I love a good grilled steak.

When I say that birthdays are a big deal, I mean they are an extravaganza. Sometimes we'll celebrate for a whole week with good food, trips to local interesting places, and specially kind treatment for the birthday king/queen, who has to wear the birthday crown. When our girls lived at home, we'd have cupcakes for breakfast before school on the birthday day, too.

So in honor of my birthday week, I'm offering some of our favorite ways to dress up a steak. Which one do you think I'll choose for my birthday dinner?

1. Joe's Grillmaster Blend

2 tbsp Sea salt
2 tbsp Pepper – fresh ground
2 tbsp Paprika
1 tbsp Garlic powder
1 tbsp Onion powder
1 tbsp Thyme - dried
2 tsp Sugar
2 tsp Chives – dried (optional: garlic chives – dried)
1 tsp Celery seed
1 tsp Nutmeg

Blend ingredients. Generously rub on steak, burgers, chops and let stand for at least ½ hour. Grill!


2. Spicy Coffee Rub


Spicy Coffee Steak Rub


This rub from Bon Appetit magazine works especially well if you baste it in butter while searing on a stove, then indirect-heat roasting it in the oven or on the grill.

1 tbsp Aleppo pepper
1 tbsp finely ground coffee beans 
1 tbsp freshly ground black pepper 
2 tsp (packed) dark brown sugar 
1 tsp smoked paprika
1 tsp mustard powder
1/2 tsp. chili powder
1/2 tsp. ground ginger

Coat 2-2 1/2 pounds of steak with the rub, and let rest for 30 minutes before roasting or grilling. This meat rub can be made ahead and stored until needed.


3. Balsamic Strawberry Marinade

Balsamic Strawberry Steak Marinade

2 tbsp grapeseed oil
2 tsp lemon zest
3 tbsp balsamic vinegar
1 tbsp sugar
2 tbsp fresh tarragon, chopped
1 tbsp chives, snipped
2 tbsp ground black pepper
2 cups strawberries, sliced (you can use frozen if fresh is not available)

Stir together all ingredients and let sit for 30 minutes. Drain the liquid from the strawberries and set the berries aside. Pour the marinade over the steak and allow to sit for at least 30 minutes before grilling.

When the steak is ready, top with the strawberries before serving.

Makes 2 cups marinade/topping.


4. Creamy Brandy-Peppercorn Sauce

Steak with Creamy Brandy-Peppercorn Sauce


2 tbsp butter
1 tsp peppercorns, coarsely cracked
2 tbsp Dijon mustard
1 tsp beef stock base or beef bouillion granules
1/2 cup brandy
3/4 cup half-and-half

Melt the butter in a small saucepan on medium heat. Stir in the peppercorns. Whisk together the mustard, stock base, and brandy, and then pour it into the pan. While it simmers, stir in the half-and-half. Serve hot over a freshly-grilled steak.

This steak is also shown with sauteed onions and mushrooms, which make any steak taste even better. 

Makes about 1 1/4 cups of sauce.


5. Asian Ginger Marinade

Try this on a flank steak cooked medium-rare, then thinly sliced across the grain. Mmmm.

1/3 cup soy sauce
2 tbsp lime juice
2 tbsp fresh ginger, finely grated
2 tsp sesame oil
2 garlic cloves, minced
1 tbsp fish sauce

Whisk together all ingredients. Pour all but 2 tbsp over 2-2 1/2 pounds of steak, and let it marinate for at least 30 minutes before cooking. Pour the last 2 tbsp of marinade over the steak after slicing.

NOTE: if you ever have leftover marinade that has been soaking into raw meat, either discard it or bring it to a boil and cook for 10 minutes before pouring it over the meat, This will kill any pathogens that might have been in the raw meat.

Read more...

Basic Tomato Sauce and Recipes for Using It

>> Wednesday, February 27, 2013


Basic Tomato Sauce
Marinara sauce is a basic Italian tomato sauce.
Jessie, the next Sunday you're at home doing your schoolwork and Erich's watching the hockey game, why not try making some homemade tomato sauce? I promise you it tastes better than any spaghetti sauce in a jar, and it's the basis for a bunch of other tasty recipes. It will also fill your apartment with humidity and mouth-watering aroma in the middle of a cold and dry winter. You can make a big pot of it, freeze the leftovers, and use it for a bunch of the recipes I've listed below.

I think fresh herbs are the best, so come home and get some from my windowsill whenever you want.

By the way, did you know different pasta shapes are best for different sauces? Generally, the lighter and more delicate the sauce, the thinner the pasta. Shapes that are tubes like penne hold really juicy sauces, and ones that have bumpy shapes like farfalle or rotini are good for sauces with a lot of texture and lumps.

Mmm,fresh herbs.

Ingredients

1 tbsp olive oil
2 tsp red pepper flakes
1 large onion, diced (about 1 cup)
4 garlic cloves, chopped
1 15-oz can tomato sauce
1 small (4-5 oz) can tomato paste
1 1/2 cups beef broth
6 cups chopped fresh Roma tomatoes, or 1 64-oz can chopped tomatoes
1/2 cup red wine
2 tbsp fresh or dry oregano, minced
1/3 cup fresh basil, chopped, or 3 tbsp dry basil
1 tbsp brown sugar
1 1/2 tbsp salt

Directions

Heat the oil in a big pot on medium heat. Add the pepper flakes, onion, and garlic and saute until they are soft. Whisk together the tomato paste and broth until it is well combined, then pour it into the pot. Stir in the rest of the ingredients. Bring the sauce to a boil, then reduce heat and let it simmer for at least an hour, or until the sauce is thick and smooth.

Garden Vegetable Spaghetti Sauce

This is one way I used to slip some extra veggies into your diet when you were younger, and I'm not sorry, either. This might be a good way to get Erich to eat more vegetables.

4 cups Tomato sauce
1 cup carrots, diced
1 cup red or green bell peppers, finely chopped
1 cup mushrooms, sliced
1/2 cup celery, finely chopped
1 cup beef broth

Mix all the ingredients in a pot and simmer for 1 hour. Serve over pasta.
Serves 4-6.

Basic Lasagne

2 cups Tomato Sauce
6 sheets lasagne noodles
1 1/2 cups ricotta cheese
2 eggs
2 tbsp oregano
2 cups shredded provolone cheese

Boil the lasagne noodles until soft, then drain them. Heat the oven to 350 degrees. Spray an 8x8 casserole dish with butter spray, then spread 1/2 cup of tomato sauce in the bottom of the pan. 

Stir together the ricotta, eggs, and oregano. Lay down 2 lasagne noodles in the pan, cutting them so that they fit. Spread 1/2 of the ricotta over the noodles, then spread 1/2 cup of the sauce over the ricotta mixture. Lay down 2 more lasagne noodles the opposite way. Spread with the rest of the ricotta and 1 cup of mozzarella. Lay down the last two noodles, then spread the rest of the sauce over the top. Sprinkle with the rest of the cheese.

Cover the pan with foil and bake about 45 minutes, until the casserole is cooked through and the cheese is melted.
Serves 4-6.

Chicken Parmesan

4 breaded chicken patties
3 cups tomato sauce
1 1/2 cups mozzarella cheese
1/4 cup shredded parmesan cheese (we like to buy a wedge of parmesan and grate it at home)
1 tbsp dried oregano

Heat the oven to 375 degrees. Spread half of the tomato sauce in the bottom of a 9x13 casserole dish. Place the chicken in a single layer on top of the sauce. Pour the rest of the sauce over the chicken, then sprinkle with the mozzarella, parmesan, and oregano. 

Cover the pan with foil and bake for 20 minutes. Take off the foil and bake until the cheese is slightly browned and the chicken is very hot.

Italian Spaghetti and Meatballs

4 cups tomato sauce
1 cup beef broth
1 egg
1/2 pound uncooked Italian sausage links
1/2 pound lean ground beef (I like the 80% to 93% lean, even though it's more expensive)
1/3 cup bread crumbs
1 package spaghetti

Pour the sauce and broth into a pot and bring it to a simmer over medium heat. Cut the skin off the sausage and crumble it into a mixing bowl. Crumble the hamburger meat into the bowl, then stir in the rest of the ingredients. 

With your hands, roll about 1 tablespoon of meat into a tight ball, and drop it into the sauce. When you've made all the meatballs and put them in the sauce, put a lid on the pot, turn the heat to low, and let it simmer for 45 to 60 minutes, until the meatballs are done and the sauce is thick.

Boil the spaghetti according to the package directions, and serve the sauce and meatballs over the top of the spaghetti.

Serves 4-6.

Pasta Alla Vodka

3 cups tomato sauce
1/2 cup vodka (try pepper vodka!)
2 tsp red pepper flakes or ground cayenne pepper
1 cup half-and-half
1/4 cup chopped basil leaves, or 2 tbsp dried basil
1/3 cup grated Parmesan cheese
1 package fettucine

In a saucepan, simmer together the tomato sauce, vodka, and red pepper flakes for 20 minutes. Turn the heat to low. Pour in the half-and-half, basil, and parmesan, and warm through for 15 minutes. Make sure it doesn't boil, or the cream might separate and look curdly. It will still taste good, though.

Cook the pasta according to the package directions, then toss together the pasta and sauce before serving.

Serves 4-6.


Read more...

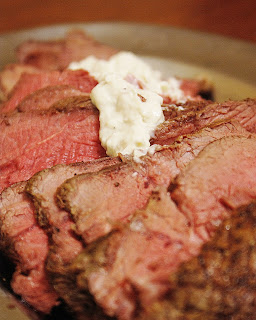
Beef Tenderloin with Horseradish Blue Cheese Sauce

>> Friday, December 14, 2012


Beef Roast with Horseradish Blue Cheese Sauce


This roast is good enough for Christmas dinner or a special dinner party. A buttery-smooth tenderloin or lean sirloin roast is best, but the low-fat and flavorful horseradish sauce will dress up any beef roast. I personally could just eat the sauce with a spoon, but I'm crazy about blue cheese in general. Maybe I should just say that the roast is optional. Go for the sauce!

The original recipe came from Weight Watchers, so you know it's a guilt-free and scrumptious meal.

Ingredients

2-3 pound beef tenderloin or sirloin roast
2 tbsp oil
1/2 tsp freshly ground pepper
1/4 cup fat-free mayonnaise
1/4 cup fat-free sour cream
2 tbsp prepared horseradish
1 tsp sweet paprika
1/4 cup blue cheese, crumbled
1 tbsp Worcestershire sauce
1 tbsp lemon juice

Directions

Heat oil in a frying pan. Sprinkle the meat with salt and pepper, then brown it on all sides. Heat the oven to 275 degrees and roast the meat until it reaches 130 degrees on a meat thermometer (60 to 90 minutes, depending on the weight). Remove it from the oven, cover it with foil, and allow it to sit for 5 minutes before carving.

While the meat is roasting, stir together the rest of the ingredients and allow it to chill until ready to serve. We like to warm up the blue cheese sauce before passing it with the meat.

Serves 6-8 4-oz servings. If you follow Weight Watchers, these are 8 points per serving with 2 tbsp sauce.


Read more...

Jalapeno Jam

>> Sunday, September 2, 2012

Unfortunately, this recipe did not make it into Angela's book, The Complete Guide to Food Preservation. But it's a tasty and colorful green-and-red jam that's an unusual way to use up end-of-summer peppers. This jam makes an excellent appetizer when warmed slightly and poured onto a brick of cream cheese or other soft cheese. Serve with crackers, vegetables, pita wedges, or toast rounds. The jam also makes a delicious glaze for poultry or pork.


Ingredients


1/2 cup jalapeno, chopped and seeded
2 cups green bell pepper, chopped and seeded
1/2 cup red bell pepper, minced
1 1/2 cups cider vinegar
3 1/2 cups sugar
1/2 tsp garlic powder
1/2 tsp salt
1 package pectin


Directions

Place jalapeno and green bell peppers in a food processor or blender. Pour in vinegar and process to a smooth consistency Pour into a saucepan and add sugar. Slowly stir in pectin. Bring to a boil and cook for 15 minutes, stirring frequently, and scraping the sides. Add red pepper and boil 1 minute longer.

Pour the jam into the prepared canning jars, leaving 1/2-inch headspace. Dampen a kitchen towel and wipe around the rims of the canning jars. Screw the canning lids onto the jar just until finger-tight. Process in a boiling water canner for 10 minutes.

Yield: About 6 half-pint jars.

If you have ever wanted to learn how to can foods, check out our post on "canning basics", titled Canning With Friends.

Read more...

Salsa Verde (Green Tomatillo Salsa)

>> Monday, July 23, 2012

There's a wonderful Latino store in a neighboring town that caters to a diverse population of Asians, Latinos, Caribbean Islanders, Eastern Europeans, and Africans. The produce is fresh, cheap, and so diverse I'm constantly smelling and touching and wondering what people make with these things: four different kinds of bananas, bitter melons, foot-long beans, sixteen different kinds of peppers.

Fresh tomatillos
Tomatillos with husks on
One item that might be unfamiliar to the average American is the tomatillo. It looks like a small green tomato in a sticky, papery leaf. These cook into a tangy salsa that I like even better than tomato salsas. I've made this salsa fairly mild because I'm a wimp with spicy food, but you can make it as hot or mild as you like. I used lemon thyme instead of regular thyme, but if you don't have it, regular thyme works.

This salsa is often used to make a breakfast/brunch dish called Chilaquiles (Chee-lah-kee-lays). I'll post that recipe next!

Salsa Verde

(Salsa Vair-day)

Ingredients

4 lbs. tomatillos, husked and washed
8 medium jalapeno chiles (remove the seeds if you want to reduce some of the heat)
1 medium green bell pepper, chopped
12 garlic cloves, peeled
2 cups white onions, chopped
3 tbsp fresh oregano, chopped
1 1/2 tbsp fresh thyme, chopped
2 cups fresh cilantro, chopped
Juice of 2 fresh limes
1 tbsp sea salt
1 tbsp canola oil

Directions

Cut tomatillos in half, place in a large pot and cover with water. Bring to a boil. Reduce heat and simmer until tomatillos begin to soften, about 10 minutes. Add garlic and chiles and cook another 10 minutes.


Using a strainer or slotted spoon, remove the tomatillos, garlic, and chiles to a blender or food processor; reserve liquid. Add herbs, onion and 1 cup of the reserved liquid, blend until partially smooth but still has some chunks.

Heat oil in a large saucepan. Add salsa, 1/2 cup more of the reserved liquid, and salt. Simmer over low heat until it thickens - approximately 10-15 minutes.

Makes approximately 4 - 5 half pints.


The Complete Guide to Food Preservation
You can find other canning and preserving recipes in my book, The Complete Guide to Food Preservation: Step-by-step Instructions on How to Freeze, Dry, Can, and Preserve Food

Read more...

Why you should try Caribbean Banana Ketchup

>> Tuesday, June 19, 2012


 Why try it?
  • You get an authentic taste of the Caribbean islands, which were once called the West Indies
  • You'll surprise your friends with a unique marinade for pork, poultry, or fish
  • You'll have a new way to use up those bananas that are getting just a little too ripe
  •  You 'll like this new condiment with plain old fries, chips, raw veggies, or burgers.


Lunch in St. Lucia
 In 2007, my family went on a week-long cruise in the Caribbean. We started in San Juan, Puerto Rico, and visited St. Thomas, St. John, St. Lucia, Barbados, and Dominica. At each stop, groups of us tried ziplining, river tubing, relaxing in hot springs, visiting open air markets, and jet skiing; over dinner, we shared our day and then went to shows or danced in one of the discos (my parents were the best dancers!). For me, one of the best parts of the trip was snorkeling with sea turtles in Barbados on my birthday!


Beach in St. John

The food in the Caribbean is fabulous and sometimes strange to the average Midwestern American. Among these foods was banana ketchup, a condiment on most restaurant tables and often for sale in shops. Baron's ketchup, made in St. Lucia, seemed to be the favored brand. I tried it on some potatoes and was intrigued by the sweet/sour combination with spices like cinnamon and cayenne. The taste and appearance is different from tomato ketchup, but once you try this sauce, you might become hooked!


Caribbean Banana Ketchup recipe

Ingredients


8 large overripe bananas, peeled and cut into chunks
1 cup golden raisins
1 cup yellow onions, chopped
4 large garlic cloves
2/3 cup tomato paste
2 ½ cups cider vinegar
4 cups water
1/2 cup dark molasses
3 teaspoons salt
1 teaspoon cayenne pepper
1/3 teaspoon ground cloves
4 teaspoons ground allspice
1 teaspoon ground cinnamon
1 ½ teaspoon ground nutmeg
1 teaspoon ground black pepper
1/3 cup dark rum

Directions
Add the raisins, onions, garlic, tomato paste and 1/2 cup of vinegar to a blender or food processor. Puree until very smooth. Pour the mixture into a large pot.

Add the banana chunks and another 1/2 cup of vinegar to the food processor or blender. Process the mixture until very smooth. Add mixture to the saucepan. Stir in the rest of the vinegar, 3 cups of water, molasses, salt and cayenne pepper.

Bring the mixture a boil, stirring frequently, and then reduce the heat. Simmer uncovered until the sauce is very thick, approximately one hour. Stir occasionally. If the sauce begins to stick to the bottom of the pan, add some of the remaining water, up to one cup.

Add the corn syrup, allspice, cinnamon, nutmeg, pepper and cloves. Cook the ketchup, stirring frequently, for 15 minutes longer over medium heat. Stir in the rum. Remove from heat and allow the mixture to cool.

Strain the mixture well through a colander or sieve. If using the ketchup fresh, remove the ketchup from the heat and let it cool to room temperature. Store it in the refrigerator in a covered container for up to 1 month.

If canning the sauce, ladle hot mixture into pint jars, leaving 1/8-inch headspace. Dampen a kitchen towel and wipe around the rims of the canning jars. Screw the canning lids onto the jar just until finger-tight. Process 20 minutes in a canner. Cool completely before checking seal and storing.

Yield: 4-5 Pints


The Complete Guide to Food Preservation
This recipe was featured in my book The Complete Guide to Food Preservation: Step-by-step Instructions on How to Freeze, Dry, Can, and Preserve Food

Read more...

Roasted Poblano-Thyme Salsa

>> Monday, September 12, 2011


This recipe enjoyed as a complex, smoky dip with chips, as well as brushing it on grilled meats and spooning it on Mexican dishes. While the process may take a little longer than other salsas, you will appreciate the final result. This recipe appears in Angela's book, "The Complete Guide to Food Preservation: Step-by-Step Instructions on How to Freeze, Dry, Can, and Preserve Food."

Ingredients:

3 lbs. plum tomatoes, about 20 medium
4 fresh poblano chilies
1 large red onion, sliced 1 inch thick
12 garlic cloves, peeled
2 cups tomato puree
1/2 cup water
2/3 cup chopped fresh cilantro
4 Tbsp. chopped fresh thyme
4 tsp. salt

Directions:


1. Heat the broiler or grill. Place whole tomatoes and poblanos on a broiler pan or cookie sheet.

2. Broil or grill close to the heat until the exposed side is blotchy, black, and peeling. Turn over the tomatoes and poblanos and roast until both sides are blistered and the skin is blackened.

3. Turn down the heat to medium. Mix together the onion and garlic and place them on another broiler pan. Roast or grill them, turning frequently, until the onions and garlic are soft and have browned edges. Cool to room temperature.

4. Pull the peels from the cooled tomatoes and cut out the tomato cores. Pull the peels off the chilies, and then open the peppers and remove the stem, seed pod, and any remaining seeds. Chop the peppers into l inch pieces and place in a large mixing bowl.

5. In a food processor, pulse the onion and garlic until finely chopped. Add to the bowl of poblanos.

6. Coarsely puree the tomatoes in the food processor, and then add them to the bowl. Stir in the tomato puree, water, cilantro, thyme, and salt. This fresh salsa should be used within five days if you are not planning to can it.

7. For canning, ladle salsa into sterilized pint jars, leaving 1/2 an inch of headspace. Slide a knife or spatula inside the jar to remove air bubbles; adjust headspace if necessary. Dampen a kitchen towel and wipe around the rims of the canning jars. Screw the canning lids onto the jar until finger-tight.

8. Process for 15 minutes in a boiling-water canner.

Yield: 4 to 6 pints


The Complete Guide to Food Preservation
This recipe was featured in my book, The Complete Guide to Food Preservation: Step-by-step Instructions on How to Freeze, Dry, Can, and Preserve Food

Read more...

Tzatziki Sauce

>> Monday, August 22, 2011


This Greek cucumber/yogurt sauce is one reason gyros taste so magically delicious. July and August are the months when gardeners are drowning in cucumbers, so it's a great time to make a big batch of this sauce. Best of all, it's really easy to make.

In this picture, I used the tzatziki sauce as a dressing for a cucumber salad. It can also be used as a dip for veggies or pita wedges, or a condiment for any kind of sandwich.


Ingredients

2 (8 ounce) containers plain yogurt
2 cucumbers - peeled, seeded and shredded
1 tablespoon
Juice of 1/2 lemon
3 cloves garlic, peeled and minced
1 tablespoon chopped fresh mint
2 tablespoons chopped fresh dill
1/2 teaspoon white pepper
salt to taste

Directions 

In a medium bowl, combine all ingredients. Stir until well-combined. Refrigerate for at least one hour before serving.

Read more...

Parsley-Oregano Pesto

>> Friday, July 29, 2011


Our herb crop has matured faster than any other year, so we're trying a new kind of pesto. This is a fresher, lemony version of our usual pesto. Each year we put away quite a bit of pesto from our herb garden, and in the middle of winter, when we're out of dinner ideas, we always seem to come across one more package of frozen pesto.

Ingredients

1 cup fresh parsley, stems removed
1/2 cup fresh oregano leaves
1/4 cup walnuts, toasted
1/4 cup olive oil
1 clove garlic
2 tsp grated ginger
3 tbs lemon juice
1 tsp sea salt

Directions


      Process all ingredients in a blender or food processor, until thick and creamy. Freeze in 1/4 cup portions in small freezer bags. To cook, heat and toss with cooked pasta.

Read more...
Related Posts Plugin for WordPress, Blogger...

  © Blogger template Simple n' Sweet by Ourblogtemplates.com 2009

Back to TOP