Duck in Green Pumpkin-Seed Sauce (Pipián Verde con Pato)

>> Wednesday, October 31, 2012


This interesting duckling in pumpkin-seed sauce recipe is from central Mexico. It reminds us that pumpkins and other squashes are New World foods, and indigenous people used the pulp and seeds for many different purposes. Nowadays, we mostly think of Jack-O-Lanterns, pumpkin pie, and salted seeds when we think of pumpkins, but the husked seeds are often used in Mexican foods. Another version of the pipián sauce is red, and uses sesame seeds instead of the little hulled pumpkin seeds called pepitas.


Fall is duck-hunting time in Mexico, too. Many species of duck fly to the Southwestern US and into Mexico when the weather gets cold up north. If you're not a hunter, don't have any duck-hunting friends, and you can't find any duckling in the store, any kind of poultry will work well for this recipe. However, the richness of duck breast is especially delicious with the creamy and slightly spicy pumpkin seed sauce.

We turned down the heat in the original recipe from Guanajuato, a state in central Mexico where Angela's ex-mother-in-law lived. Add more serrano peppers if you like.

Ingredients

1 5-lb duck
1 tbsp oil

Pipián sauce

8 medium tomatillos (about the size of a plum)
6 cups chicken or vegetable broth
1 cup hulled raw pumpkin seeds, plus 2 tbsp for topping
1/2 cup white sesame seeds
3 tbsp oil
1/2 cup onion
4 garlic cloves, minced
1/2 cup cilantro, minced
1 tbsp Mexican oregano, minced
2 tsp freshly ground black pepper
3 serrano peppers, seeded and chopped

Directions

Cut the duck into quarters and pierce the skin all over with a fork. Heat oil in a large saucepan. Fry the quarters, skin side down, until nicely browned (do this in batches if the pieces don't brown easily). Don't turn over the pieces; the fatty skin side will get nice and crispy this way. Once the skin side is browned, drain off the rendered fat and put a lid on the pan. Cook the duck for 40 minutes, or until the meat is tender.

Meanwhile, peel the husks off the tomatillos and scrub off the sticky sap. Cut them into quarters and cover them with 3 cups of chicken broth. Bring to a boil, reduce heat, and simmer for 10-15 minutes or until soft. Allow to cool.

Heat 1 tbsp of oil in another pan, and toast the sesame seeds until they are golden brown. Pour the seeds into a blender. Heat the rest of the oil and toast the pumpkin seeds until slightly browned and fragrant. Set aside 2 tbsp for the topping, and place the rest in the blender.

Add the garlic, black pepper, cilantro, oregano, and serrano peppers to the blender. Pour in the tomatillos and the broth used to cook the tomatillos. Blend until smooth.

Heat the last 1 tbsp of oil in a saucepan. Pour in the sauce and warm it on low heat for about five minutes, stirring frequently. Don't let the heat get too high or the sauce will lose its green color. Little by little, add the rest of the broth, stirring frequently. The sauce should become the consistency of thick cream. If you heat it too much and it gets curdly, return the sauce to the blender and blend it until smooth again.

Salt it to your taste, then add the duck pieces, skin side up. Heat for 10 minutes.

Serve by spooning a cup of sauce onto a plate, then placing a duck quarter on top of the sauce, then topping it with a splash of sauce and a sprinkle of pumpkin seeds. This is good with rice; we especially recommend wild rice, grown where the ducks like to nest. You might want to try our Mushroom and Pine Nut Wild Rice Pilaf.

Serves 4-6.

Read more...

Scalloped Potatoes and Ham

>> Friday, October 19, 2012

This is one of my absolutely favorite comfort foods ever. A good ham is proof that God loves us. I usually make this after serving a big ham for a holiday dinner, because there are always all those good bits and pieces left over, and this is so easy to make after a big fancy holiday meal.

If you don't happen to have cooked a big ham lately, you can use any kind of ham, from lunch meat slices to a can of Spam or a ham butt end. Joe recently brought home a butt (snicker) that our local grocery store had deeply reduced in price. After we sliced up a bunch for ham sandwiches, and cut out the bone for soup, I made a big casserole of scalloped potatoes and ham.

By the way, if you don't have any ham, or are on a very tight budget, the potatoes themselves are a filling and yummy meal or side dish on their own.

Ingredients

1 medium yellow onion
1/3 cup chopped yellow pepper 
2 tbsp butter
2 tbsp oil
2 garlic cloves, minced
1/2 cup flour
2 cups fat-free milk, heated
10 medium-sized red-skinned potatoes (I like the smooth, creamy texture of red potatoes for this recipe)
2 cups chicken broth
3 cups chopped ham
Cooking spray
2/3 cup bread crumbs


Directions

Peel and chop the onion. Melt the oil and butter together in a saucepan. Saute the onion and pepper together until tender. Add the garlic. Stir in the flour until it is moistened and sticks to the vegetable pieces. Pour in the hot milk and stir very well until smooth. You might need to whisk the mixture to get any flour lumps out. Allow to simmer.

Scrub the potatoes and cut them into 1/2 inch thick slices. Put them into a pot with the chicken broth and bring it to a boil. Turn down the heat and simmer it until the potato slices are almost tender but still a little hard when you poke them with a fork. 

Drain the potatoes, and pour the cooking broth into the milk mixture. Heat the mixture to a boil and reduce heat and let it simmer about 20 minutes, stirring frequently, or until very thick like pudding or gravy.

Preheat the oven to 350 degrees.

Spray or oil a 9x12" casserole pan. Spread a few spoonfuls of the white sauce in the bottom of the pan. Arrange 1/2 of the potatoes on top, then half of the ham. If you want to get artistic, you can arrange the potato circles in overlapping rows, or "scallops", which is one reason for the name of this recipe.

Pour half of the white sauce over this layer. Add another layer of potatoes and ham, and then pour the rest of the sauce on top. Make sure there is at least 1/2" rim above the food so that it won't boil over in the oven and make a mess. It's OK if you have to discard or freeze some leftover white sauce. There are a million things you can do with it.

Cover the pan with aluminum foil and put it in the oven. Cook for 20 minutes, then remove the foil. Sprinkle the breadcrumbs over the top, then spray them with cooking spray. Cook for 10-20 minutes more, or until the potatoes are tender but not falling completely apart, and the breadcrumbs are nice and browned.

This is great with cooked peas or a fresh green salad.

Serves 6 - 8.

Read more...

Heirloom Tomato Soup

>> Wednesday, October 10, 2012

Heirloom Tomato Soup
A few weeks ago, my friend and master chef Talea gave us a pot of tangy, rich tomato soup using the heirloom tomatoes from her garden. The varieties she grew this year have some unusual shapes and colors. One had burgundy stripes and greenish flesh, one has a wavy surface, and one is a brilliant yellow color. The taste is extraordinary.

If you can't find heirloom tomatoes, try to find deeply colored tomatoes that are soft and juicy and give off a tomatoey smell. Many of the big grocery stores buy tomatoes that were picked while still green and then sprayed with a substance that turns them red and prevents them from ripening further, so that they can be shipped anywhere. These tomatoes are flavorless wooden balls that just won't do the recipe justice.

If you grow your own tomatoes, now is the time to collect those last few fall-ripened beauties and whip up a big pot of soup. Is there anything more satisfying on a chilly fall day?

Talea rattled off her recipe to me several times, and I think I've finally captured it here. It is so good.

Ingredients

3 pounds of ripe heirloom tomatoes (or other very ripe fresh tomatoes)
6 cloves of garlic
2 cups sliced yellow onion
1/3 cup olive oil
4 cups chicken or vegetable broth
1/2 cup chopped fresh basil leaves
1 tbsp thyme
1 bay leaf
2/3 cup fat-free cream
Salt and pepper to taste

Directions

Preheat the oven to 450 degrees.

Cut the stem end out of the tomatoes and cut them in half. Place the tomatoes cut-side down on a baking sheet. Place the garlic and onions on the roasting sheet and drizzle them with the olive oil. Roast under the broiler until tender and browned, turning occasionally - about 30 to 45 minutes.

Squeeze the garlic cloves out of their skins. Place 1/4 of the vegetables, basil, thyme, and tomatoes in a blender or food processor, along with 1 cup of broth. Puree until smooth. Pour the puree into a soup pot, and repeat with the remaining batches of  tomatoes, broth, basil, thyme, and vegetables. Drop the bay leaf into the pot.

Bring the soup to a boil; reduce the heat and let it simmer for 30 to 45 minutes, until it is thickened and reduced. Don't forget to stir it occasionally. Stir in the cream, salt and pepper and heat through without boiling the soup. Take out the bay leaf before serving.

Makes 4-6 servings.

Note: This tastes really good with a couple slices of honey whole wheat bread. You can find that recipe here: Honey Whole Wheat Bread.

Read more...

Honey Whole Wheat Bread

>> Saturday, September 29, 2012


When I was a kid, my mom and I used to bake bread together often, using the Better Homes and Gardens cookbook. In fact, one summer we baked so much bread that I could see my arm muscles developing from the kneading. I bet we didn't buy a single loaf that year. These are wonderful memories for us.

Baking bread is much more fun if you have some friends to help you. Bread-baking takes time, but the dough-rising periods are great times to sit back with a cup of coffee or tea and have a good chat. This classic recipe comes from my friend Becky, who bakes every week.

One step in the process, towards the end, is where Becky rolled out the twice-risen dough with a rolling pin. She then began to roll up the dough jelly-roll style before putting it into the loaf pans. We asked her why she did it that way, and she said, "I don't know. That's just the way my mom taught me."

Later, when I sliced into my finished loaf, I found that the rolling pin pressed down the large air bubbles, and the resulting loaf had tiny, evenly-spaced bubbles and a hint of a spiral pattern towards the center of the loaf. Her mother is a wise woman.


Ingredients

3 cups warm water (110-112 degrees)
1 (.25 ounce) package active dry yeast or 2 1/4 teaspoons active dry yeast from a jar
2/3 cup honey
3 cups whole wheat flour
3 tablespoons butter, melted
1 tablespoon salt
3 to 3 1/2 cups white flour
2 tablespoons butter, melted

Directions

In a mixing bowl, stir together the warm water, yeast, and 1/3 cup honey. Stir in the wheat flour until well combined. Allow to rest for 30 minutes, until the mixture has large bubbles forming on the surface.

Stir in 3 tablespoons melted butter, 1/3 cup honey, and salt. Stir in 2 cups of the white flour. Sprinkle flour on a flat surface and knead until the dough is sticky to touch and but does not stick to the flat surface, using the rest of the white flour as needed.

Grease a bowl that is at least twice as large as the volume of dough. Place the dough in the greased bowl, and then turn it over to coat the other side of the dough. Cover with a damp dishtowel. Let rise in a warm place until doubled in size, about 1 to 1 1/2 hours.

Punch down the dough and divide it in half. Sprinkle a flat surface and a rolling pin with flour. Roll out half of the dough into an 8x12 rectangle. Staring at one of the short ends, roll up the dough jelly-roll style, tucking in the sides occasionally, and pinching the end shut. Place it in a greased 8x4x2 loaf pan. Repeat with the other loaf.

Cover the loaves with a damp dishtowel and allow to rise until dough has doubled - about 45 to 60 minutes. Preheat the oven to 350 degrees.

Remove the towel and bake at 350 degrees for 25 to 30 minutes, until the crust is golden. Remove from the oven and brush the tops of loaves with 2 tablespoons melted butter. Turn out of the pans and cool on a baking rack. For best results, slice it at room temperature.

Makes 2 hearty loaves.

Read more...

Cucumber Salad two ways

>> Thursday, September 13, 2012

Jessie and Jenn, this is that salad you gobble up every time I make it. Grandma used to make it all the time when I was a kid, usually in the summer after we picked a big load of fresh cukes. Of course I had to add my own modifications because that's what I do. I like it both ways but the sour cream version is my favorite.

The ingredients list and directions are at the end of the photos.


Step 1
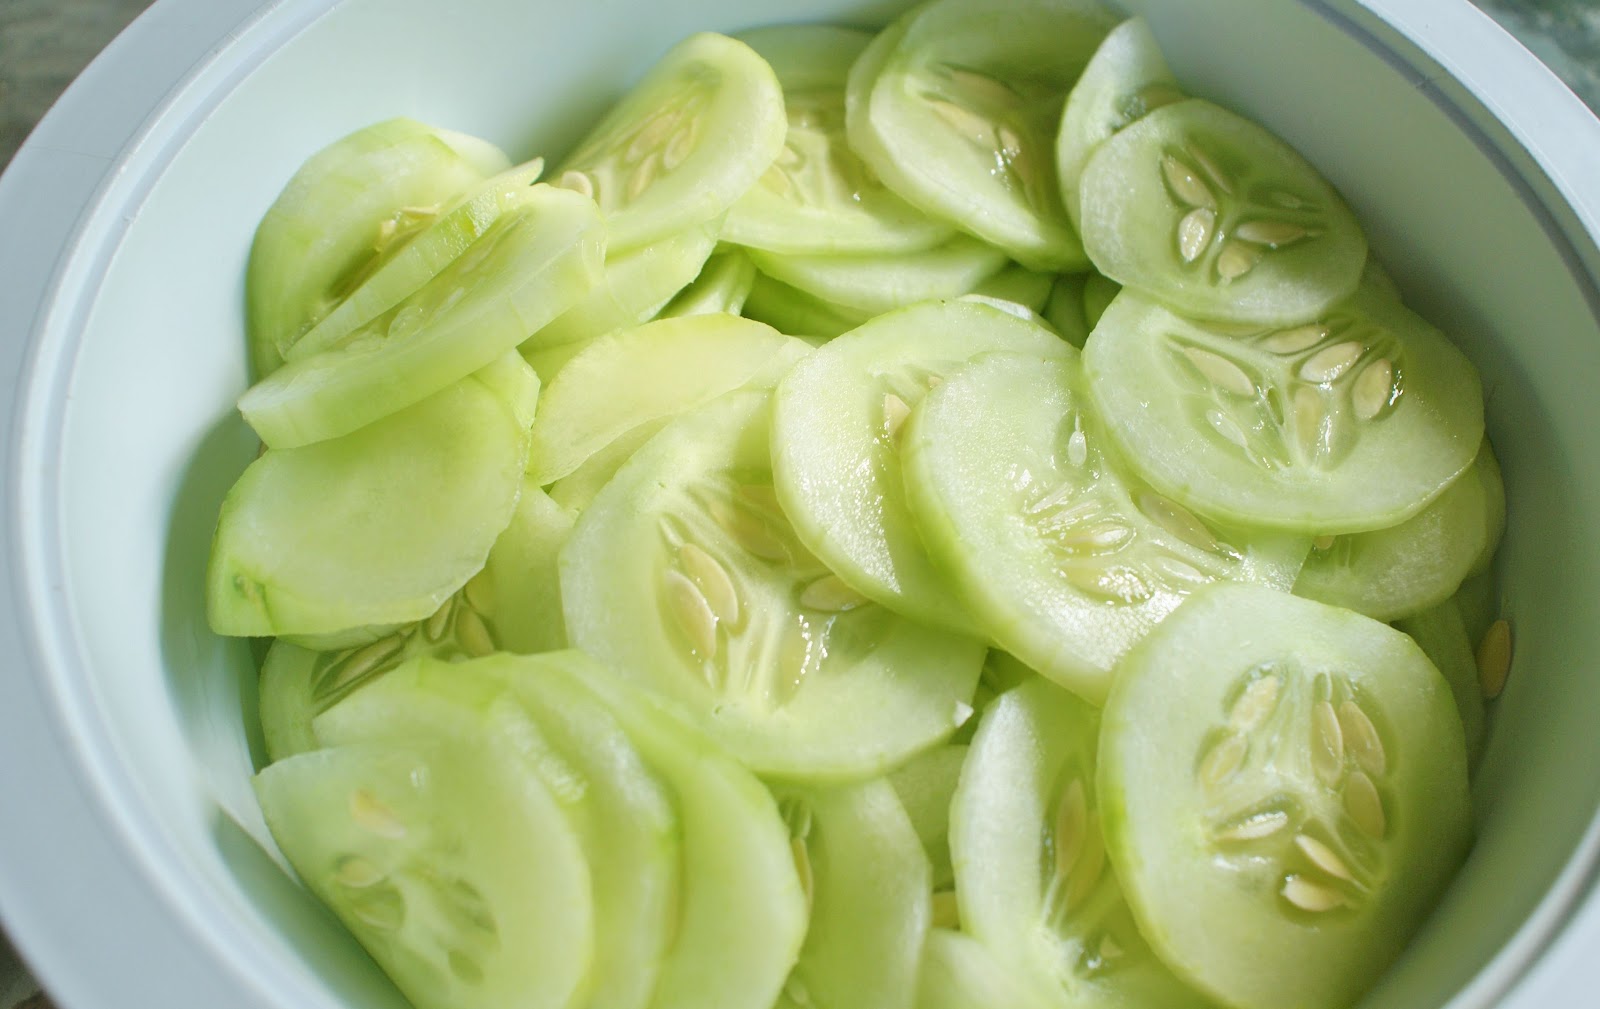
Step 1. Peel three medium cucumbers. Usually I peel them lengthwise while leaving 1/2 inch wide strips of peel between, but when cucumbers have thick dark green peels, the peels often taste bitter. I took it all off these cukes.


Step 2
Step 2. Cut off the ends of the cukes, then slice them very thinly. A really sharp knife helps. Put the slices into a mixing bowl.


Step 3

Step 3. Add chopped herbs. This herb is lovage, which tastes somewhat like celery and is a little sharp-tasting. I'm guessing you wouldn't like it, but I added to my salad when a friend gave me some from her garden. I also added some chopped fresh chives and parsley from those herb pots on my windowsill. Put this in the bowl with the cukes.


Step 4
Step 4. Cut the ends off a small white onion and cut off the outside peel. I like white onions for this recipe because they are milder and sweet tasting. If you use yellow onions, you'll probably need less because they have a sharp taste. Cut the onion in half through the rings, then place the cut side down on the cutting board. This helps prevent the onion from rolling while you cut it into very thin slices. I like a lot of onion. You add as much as you like. Put this in the bowl with the cukes.


Step 5
Step 5. Sprinkle the bowl with salt, pepper, garlic powder, and dill. Stir it all up.


Step 6
Step 6. Here is where you decide which salad you want to make. The one without sour cream is definitely healthier. To make that one, add 1/4 cup vinegar and 1 teaspoon sugar. I like the apple cider vinegar for this salad, but use what you have.

If you want to make the sour cream version, use 1 teaspoon sugar and 1 tablespoon vinegar. Stir it together with 1 cup of sour cream and 2 tbsp crumbled Gorgonzola or blue cheese.

Put the salad in the fridge and let it marinate for 1 or 2 hours before serving.


Step 7
Step 7. Remember how I always say that things taste better if they are in a pretty container? Put the salad in a pretty bowl before serving. You can sprinkle it with a little dill or put a piece of parsley on top as a garnish.

Ingredients

3 medium cucumbers
1 small white onion
1 tsp chopped dried chives or 2 tsp chopped fresh chives (optional)
1 tsp chopped dried parsley or 2 tsp chopped fresh parsley (optional)
1 tsp chopped fresh lovage (optional)
1 1/2 tsp chopped dried dill or 2 1/2 tsp chopped fresh dill
1/2 tsp garlic powder
1/2 tsp salt
1/2 tsp pepper
1/4 cup cider vinegar and 1 teaspoon sugar
      OR
1 teaspoon sugar, 1 tablespoon vinegar, 1 cup sour cream, and 2 tbsp crumbled Gorgonzola or blue cheese

Directions

Peel and thinly slice cucumbers and onions and place in a bowl. Sprinkle the chopped herbs, seasonings. sugar, and vinegar over the vegetables and stir well. Stir in sour cream and gorgonzola, if using. Cover and let marinate in the refreigerator 1-2 hours before serving. This will taste best if you take it out 1/2 hour before serving and let it warm up to room temperature. Stir before serving.

Read more...
Related Posts Plugin for WordPress, Blogger...

  © Blogger template Simple n' Sweet by Ourblogtemplates.com 2009

Back to TOP