Ricotta Gnudi with Wild Mushroom Sauce

>> Monday, December 29, 2014


Ricotta Gnudi with Wild Mushroom Sauce


New to gnudi? These little dumplings are actually the filling of ravioli; because they don't have a pasta covering, they're called "nude" in Italian. Gnudi, nude, yum. Though we love ravioli, we haven't perfected the homemade process yet. These are simpler.

Though we're just now seeing gnudi pop up on menus in the U.S. (see this Chicago Tribune article, "Gnudi May Make You Forget Ravioli"), gnudi has been a long-time love affair in Italy.

Here's a recipe for gnudi that satisfies our winter cravings for hearty food while giving us a break from a week of heavy meat-eating - not that I'm complaining! Around holidays, I'm always thankful I'm a carnivore.

Most of the recipe can be made days in advance (like a weekend when you have time to do some extra cooking), then finished up on the day you want to eat the ricotta gnudi. By the way, if you happen to have some fresh sage in your garden, snip a few leaves and crisp-fry them with the meat, then arrange them on top of the finished dish. Yum!


Ricotta Gnudi with Wild Mushroom Sauce


Truffle oil or salt is a luxury item that's rarely in our budget. But this year, Joe found a bottle of white truffle cream among his Christmas presents. It has butter, parmesan, and a bit of garlic, along with white Italian truffles. The musky, intense flavor was worth the big splurge, and added amazing flavor to this dish.

Ingredients

For the gnudi

1 pound low-fat ricotta cheese
1 large egg
1/3 cup Pecorino Romano (or Pamesan)  cheese, freshly grated
1/4 tsp thyme
Salt and white pepper to taste
3/4 cup all purpose flour
1/2 cup flour, for coating

For the sauce

3 tbsp olive oil
4 slices pancetta or lightly cured bacon (omit if you want a vegetarian dish)
8 fresh sage leaves (optional)
1 pound mixed mushrooms (such as portabellas, button, crimini, oyster, and stemmed shiitake), sliced
1 cup onion, sliced and halved
1 tsp fresh thyme
1 tsp chopped sage
2 cups low-salt vegetable or chicken broth
1 teaspoon truffle oil (optional)
4 tablespoons butter, diced


Instructions


For gnudi: (note: the gnudi can be made several days ahead of time and chilled until ready to cook.)
Line medium bowl with up to 10 layers of paper towels. Spoon ricotta cheese into bowl. Wrap and squeeze moisture out. Re-line the bowl and repeat one more time. Finally re-line the bowl and let drain at least 30 minutes and up to 1 hour. This process removes a lot of the water that will prevent your gnudi from cooking up fluffy.

Beat egg, 1/3 cup Pecorino Romano cheese, thyme, salt, and white pepper in large bowl to blend. Mix in ricotta. Sprinkle 3/4 cup flour over and stir gently to blend. Cover and chill dough 1 hour. Can be made 1 day ahead. Keep chilled.

Line rimmed baking sheet with plastic wrap. Place some flour in bowl. For each gnudi, gently roll 1 heaping teaspoonful of dough into ball, or roll between fingers and palm into a finger shape. Add to flour; toss to coat lightly with flour. Place on baking sheet. Can be made 4 hours ahead. Cover; chill at least 30 minutes.

Ricotta gnudi on prep pan


For the sauce (Note: this sauce can be made several hours ahead of time)

Heat 1 tablespoon oil in large pot or extra-large skillet over medium-high heat. Add the pancetta or bacon. Cook until beginning to brown, about 2 minutes per side. Let it drain on paper towels. Add whole sage leaves to pot or skillet; fry until crisp, about 1 minute per side. Let them drain with the bacon.

Heat the rest of the oil in same pot over medium-high heat. Add all mushrooms, onions, thyme, and chopped sage. Sauté until the mushrooms are brown and liquids evaporate, about 12 minutes. Add broth to same pot and boil until slightly reduced, scraping up the browned bits, about 5 minutes. Stir in the truffle oil or cream. Add the salt and remove from heat.

Cook gnudi in large pot of boiling salted water until very tender and fluffy, 8-10 minutes. Drain and set aside.

Add the butter to the sauce and warm it to a low simmer. Add the gnudi and gently toss until the sauce coats the gnudi.

Serve in a large bowl with the crumbled pancetta and whole sage leaves scattered over the top.

Serves 4-6.

Read more...

Marshall Field's Cinnamon Toast Hot Cocktail

>> Tuesday, December 23, 2014


This drink is too good to not share again. Put something warm in your belly, and let the warmth of the season fill you up, in whatever way you celebrate.

Generations of Chicagoans have traveled to the Walnut Room in Chicago's downtown Marshall Field's shopping emporium for Christmas gifts and a very special meal. Even though Macy's took over the Marshall Field's property some years ago, if you go down to State Street and Randolph today you'll still find the luxurious service, Frango mints, and the stunning two-story Christmas tree in the walnut-paneled dining room.

Macy's Walnut Room Restaurant

I'm a relative newcomer to the Walnut Room; my first trip there I was interested in the handsome and elusive Joseph Duea who eventually asked me to marry him a few blocks away at the Art Institute. That year, the first Harry Potter book had blasted away all sales records, Marshall Fields' was still Marshall Fields', and the Walnut Room tree was decorated with hundreds of snowy owls from the novel.

This year I went for lunch with a few of my friends, and the menu has retained some classics while updating for today's tastes. The restaurant still serves a dish called "Mrs. Hering's 1890 chicken pot pie". It also offers "Field's special salad" which is similar to a club sandwich in a bowl, and is all that my friend Robin really remembers from holiday trips downtown with her Grandma.


Macy's (Marshall Field's), downtown Chicago

I'm guessing a more recent touch is the "fairy princesses" who travel the dining room offering you sparkling magic dust to help you when you close your eyes and make a wish. Their satin tip bags, with dollars dangling suggestively from the openings, were the only tacky touch of the entire experience, and I assure you my tack-o-meter has been finely honed over time.

Still, we all made our quiet wishes. My friends and I spent the rest of the day distracted by the glitter on our noses and eyelids, rather joyful from warming up with a signature cocktail they called "Cinnamon Toast".

Ingredients

48 ounces apple cider
2 cups Amaretto
1 cup whipped cream
2 tbsp cinnamon
2 tbsp sugar
4 cinnamon sticks, to garnish

Instructions

Heat the cider until near boiling, then stir in the amaretto. 
Stir together the cinnamon and sugar on a plate. Wet the rim of a large mug, then swirl the rim in the cinnamon mixture. Pour the cider mixture into the mug, stir in the whipped cream, then garnish with a cinnamon stick.

Makes 4 cocktails.

Read more...

Roasted Beet and Citrus Salad

>> Friday, December 19, 2014


Roasted beet and citrus salad


This is a recipe we've been refining since we tried it at an outdoor wedding this summer. Our breakthrough came when we roasted carrot spears and whole shallots with the beets. With caramel-y roasted root vegetables and a tart citrus dressing, this salad fits right into a fall/winter menu.

If you haven't tasted any beets you like, this recipe may help. Something about the combo of salty feta, sharp grapefruit, and sweet carrots mellows out the earthy taste of the beets, which has always reminded me of the smell of new-plowed fields, or that pervasive fermentation smell that comes out of Baxter and Abbott laboratories by the lake on particularly busy days.

Yes, I said mellowed out. I'm not necessarily proud of that, but it's out there now and that's that. Pass the beets!

Roasted Beet and Citrus Salad Ingredients:

1/2 pound small beets
1/2 pound carrots
4 shallots (substitute 2 onions and 2 garlic cloves if shallots are not in your budget - they usually aren't in ours!)
2 tbsp oil
1 grapefruit
2 oranges
6 cups mixed greens
2/3 cup soft feta cheese


For the dressing

2 tablespoons red wine vinegar
3/4 cup orange juice
1/2 teaspoon sugar
1 garlic clove, minced
Salt and pepper to taste
1/4 cup canola oil

Instructions

Preheat oven to 400°.

Peel the beets, carrots, and shallots. Place them in an oiled baking pan and drizzle the rest of the oil over the vegetables. Bake at 400° for 1 hour and 10 minutes or until tender, turning occasionally.

Pour the dressing ingredients into a pan and bring to a boil. Lower heat and simmer 5 minutes. Let cool.

Cut the carrots and shallots into spears and the beets into bite-sized cubes. Peel the grapefruit and oranges until all white pith is gone, then cut into thin slices.


Arrange the lettuce on 6-8 salad plates, then add the vegetables, fruit, and cheese. Drizzle the dressing over the salads before serving.

Serves 6-8.

Read more...

Cranberry-Bourbon Glazed Ham

>> Tuesday, December 9, 2014


Cranberry Bourbon Glazed Ham


This recipe came about accidentally, when an afternoon of cooking with friends turned a little boozy and silly. What was left was a jar of bourbon-soaked cranberries and some tamales that went terribly wrong.

Luckily we found a way to use both the tamales and the leftover cranberries, which had become little red booze bombs. If you want a more authentic moonshiner taste, use some kind of real moonshine and make sure you add dark molasses to the glaze. It magnifies the sweet smokiness of the ham like you wouldn't believe.

Note: start your cranberries marinating in bourbon a week ahead if you can. If not, just whip it all up together and let the oven sort it out.

Ingredients

1 cup of your favorite bourbon
2/3 cup fresh cranberries
1 – 12-16 lb. bone-in ham
¼ cup honey
¼ cup molasses (or dark brown sugar dissolved in a little very hot water)
¼ tsp crushed red pepper flakes
¼ tsp freshly ground black pepper
1 tbsp dry mustard


Instructions

Soak the cranberries in the bourbon in a jar in the refrigerator for several days to one week.

Preheat the oven to 325°. In a blender puree the cranberries with a little of the bourbon until they are all pureed. Whisk together the bourbon, pureed cranberries, honey, brown sugar, red pepper flakes and black pepper.

Remove any skin from the ham and score the fat with ½” deep cuts about 1” apart. Put the ham, cut side down, in a large roasting pan with 2 cups of water in the bottom. I like to put it on a low rack in the roaster. Baste about ¼ of the glaze on the ham and bake with no lid.

About every 30 minutes baste the ham with the liquid and drippings in the pan, and then baste with more of the glaze. Make a foil tent over the ham if it begins to brown too quickly.

Bake for about 2 to 2 ½ hours until it reaches a temperature of 155° with a meat thermometer in the meaty part of the ham, not near the bone. Remove and let rest 15 minutes before carving and serving. Save the pan drippings and mix with the ham bone and vegetable scraps to make a delicious ham stock for soups or other recipes.

Serves about 8 hungry people.

Read more...

Braised Beef Shanks, Northern Germany-Style

>> Tuesday, December 2, 2014


Braised Beef Shanks, Northern Germany-Style

If you were traveling along the northern coast of Germany, on the North Sea side or the edge of the Baltic Sea, you might come across this creamy and substantial meal of beef shanks, bacon, vegetables, and sour cream. You might need a meal that fortifies your belly, too - the winds and snow hitting coastal towns make one crave something hearty for dinner.

This dish satisfies, and it's one you can prepare and then braise until you're ready to serve it, depending on the temperature of your oven or crockery cooker.

Ingredients

1/4 pound thickly-sliced bacon, diced
3 pounds beef or veal shanks, cut about 2 inches thick
1 large onion, peeled and chopped
1 large carrot, peeled and chopped
Salt and Pepper to taste
1 tsp thyme
2 tsp marjoram
1 cup beef broth
1 cup sour cream
3 tbsp flour

Sauté the bacon until tender but not crispy. Set on paper towels to drain. Put the beef shanks in the pan and brown on all sides. Place in a Dutch oven, roasting pan, or slow cooker. Add the vegetables, bacon, and herbs. Pour the beef broth over the meat and put the lid on the pot.

Cook at an even temperature until you are ready to eat. The meat should be fork-tender but not falling apart. With a 250 degree oven, or a crock pot on low heat, you could cook this for 6 to 8 hours, or it will be done in 1 1/2 to 2 hours in an oven at 375 degrees.

When done, take out the meat and put it on a platter, covering it with foil to keep it warm. Leave the vegetables in the pan. Skim the fat from the pan drippings and add 1 cup hot water. Bring to a boil, then reduce heat until barely simmering.

Whisk the sour cream with the flour until smooth, then stir into the pan drippings until smooth. Heat this sauce without boiling for 3-5 minutes, then pass the sauce with the meal.

Serves 4-6.

Read more...

Cashew, Clementine, and Cream Cheese Salad

>> Friday, November 28, 2014

Cashew, Clementine, and Cream Cheese Salad


My older sister, Sheryl, made this salad for a holiday dinner once, and it wowed the whole family. It's quick to make and is nicely different. Like a lot of families, there's quite a bit of planning about who's bringing what when we celebrate a holiday together. Our holidays get complicated because my family is in Ohio, Michigan, and Arizona and Joe's is in Iowa and Minnesota.

Several things are certain, though. There's always more than enough to eat, Mom will always make pies from the fruit in her orchard, and we'll always play games until late in the evening (note: "late in the evening" for my mom is 9pm; "late" is midnight for us).


Ingredients

For the Dressing 
1/2 cup vegetable oil
1/3 cup red wine vinegar
3 tbsp sugar
1 tsp tarragon
1 tbsp celery salt
1 garlic clove, minced

For the salad
5 cups mixed salad greens
4 Clementines, peeled and sectioned
1 cup cashew pieces
1 small red onion, very thinly sliced
4 oz. cream cheese

Instructions

Put the cream cheese in the freezer so that it becomes firm enough to cut.

Put all the dressing ingredients into a screw-top jar and shake until well mixed. Keep at room temperature until serving.

Arrange the greens on 4 large salad plates, then arrange the clementines, onions, and cashews over the lettuce. Cut the cream cheese into small cubes and sprinkle over the top. Pass the dressing at the table.

Makes 4 side salads.

Read more...

Maple-Fig Preserves

>> Tuesday, November 18, 2014


Maple-Fig Preserves


We ate fresh figs for the first time when we arrived at an agritourismo in Tuscany - a working farm with a bed-and-breakfast style accommodations.  The hosts had prepared an enormous five-course dinner, but on the sideboard sat a simple basket, lined with giant fig leaves, full of pale green figs.


Rosa dei Venti agritourismo, Tuscany
Rosa dei Venti, Creti, Italy

Joe picked up a fig and sliced it. We were enchanted by the simple flavor and crunch of the tiny seeds. Fruit in Italy is astoundingly better than fruit I've tasted anywhere else - and I grew up in the fruit-growing area of Southwestern Michigan.

We rarely see fresh figs in the Chicago area, and when we do they are too expensive to contemplate. Dried figs are a good alternative to make jam. I've been wanting to make this ever since I started to notice fig jam as a condiment on antipasto platters, alongside a selection of dessert cheeses, and as a sauce for pork and game.

I think this would also be wonderful poured over a round of brie and topped with chopped walnuts before heating. (Update: we tried this at Thanksgiving, warmed and poured over cream cheese and topped with pecans. Everybody raved about it, and there were no leftovers.)

Since this is my last week working with wonderful friends in my library, I brought in this jam with crackers last night, along with jars of Roasted Poblano salsa and Green Tomatillo salsa. They seemed to like it! It was nice being able to give them a going-away present; they are some of the friendliest, most helpful people I've ever worked with. I'm trying to hold back tears every time I say goodbye to another friend there.

Ingredients

16 oz. dried figs
2 cups boiling water
1 cup lemon juice
1 cup maple syrup
2 tbsp ground coriander
2 tsp nutmeg
1 tbsp vanilla
2 tsp salt

Instructions

Place the figs in a bowl and pour the boiling water over them. Let them soak 15-20 minutes, or until plump and tender.

Drain the figs, pouring the water into a pan. Set the fruit aside. Add the remaining ingredients to the water, and bring to a boil. Reduce heat, and simmer 5 minutes.

While the syrup is simmering, finely chop the fruit. Add it to the syrup and stir well. Continue simmering 30-45 minutes, or until very thick. Check whether the jam is set by pouring a little onto a cold plate. If it sets, it is ready. You can pour the jam into a jar and keep it in the refrigerator for 2-3 weeks, or follow the canning process below to keep it longer.

If you plan to can the jam, ladle it into sterilized 1/2 pint or pint jars, leaving 1/4 inch headspace. Wipe the rims, then screw on the lids. Process for 15 minutes in a boiling water bath, then allow to cool before checking the seals.

Makes about 4 cups of jam.

The Complete Guide to Food Preservation
You can find other canning and preserving recipes in my book, The Complete Guide to Food Preservation: Step-by-step Instructions on How to Freeze, Dry, Can, and Preserve Food

Read more...

Get Out the Crockpot!

>> Tuesday, November 11, 2014

Our trusty old vintage crock pot. 

Our lives are so crazy busy these days, and I bet your lives are, too. Gone are many of our slow Sunday afternoons cooking together with Third Day or Miles Davis rolling off the turntable (yes, Joe and I are purists about vinyl records. I hope that doesn't make us too geeky.)

The slow cooker is the one way we can come home from work at 9pm and have a hot meal ready to dish up. This last Sunday, while Joe made a huge batch of Gyoza dim sum dumplings for the freezer, I started up a crock pot of pulled pork for sandwiches. Instead of eating it that night, I put the whole pot in the refrigerator and plugged it in Tuesday morning. Bless the person who invented the slow cooker.

So here are some of our most favorite around-the-world recipes that are crock pot-friendly. If you have a few of your own recipes, please share!


Crock Pot Pulled Pork Sandwiches


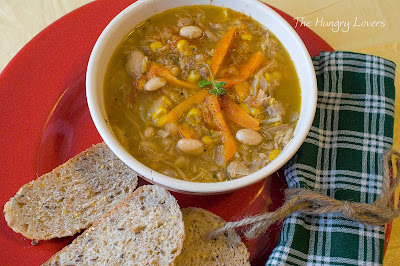
White Bean Chicken Chili


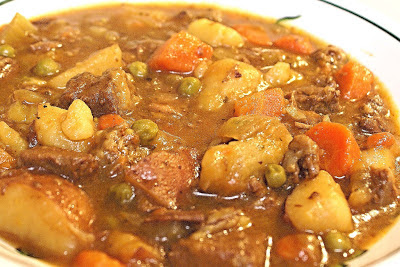
Guinness Irish Beef Stew

Read more...

Tri-Tip Steak Marinade

>> Thursday, November 6, 2014


Tri-Tip Steak Marinade


Who wants steak? We do, we do! Joe whipped up this marinade when we were looking for something interesting and new to do with steak before we slapped it on a hot grill. A tri-tip steak has a lot of flavor and is fairly cheap, but it can be a little firmer than a butter-soft strip or sirloin. The herbs and vinegar in this marinade helps to tenderize the meat while giving it a great burst of flavor.

Joe grills year-round, sometimes with an umbrella or windbreak over the grill, though our balcony has a wonderfully wide overhang that protects us from everything but the most horizontal wind. Extreme cold doesn't faze him! Dedicated man, and I'm thankful.


The triangle-shaped tri-tip is sometimes called a California cut, "Santa Maria steak", or "Newport Cut", depending on your region. In Europe, it might be called aiguillette baronne, Bürgermeisterstück, or rabillo de cadera. It's also a traditional cut in the Argentine asado buffet of grilled meats.

This is also good on the trendy hanger steak or flank steak cut, but thankfully the tri-tip is slightly less trendy, and therefore a lot more affordable!

Ingredients

4 tbsp olive oil
3 tbsp red wine vinegar
2 tsp fresh oregano, chopped
2 tsp fresh parsley
1 tsp rosemary
2 garlic cloves, minced
1 tsp dry mustard

Salt and pepper to taste

Directions

Whisk together all ingredients, then pour over 1/2 to 2 pounds of tri-tip or other beef steak. Let marinate for 30-90 minutes before grilling as usual.

Serves 4-6.

Read more...

Curried Pumpkin Bisque

>> Friday, October 31, 2014


My mom gave me this recipe the last time I visited - and she also gave me a couple of big pumpkins from their patch. We cut them into pieces and roasted them, which produced a surprising amount of pumpkin pulp. After we made this soup, we froze the rest for later.

Pumpkin pulp has a bit more of the strands you find when you carve a pumpkin, so it's not ideal for making pumpkin pie. It does, however, make luscious soups and a pumpkin-ricotta ravioli. Joe's not quite satisfied with his pumpkin ravioli yet, so we'll have to wait for the recipe until he finishes tinkering with it.

The dollop of Greek yogurt on top gives this soup an extra tang and elevates it into something special.


Ingredients

1 medium-sized (2-pound) pumpkin, quartered and seeded
1 tsp olive oil
2 cups diced onions
4 garlic cloves, minced
4 cups strong broth, vegetable or chicken
1 can coconut milk
1 tbsp ground ginger
2 tsp curry powder
2 tsp ground coriander
1 tsp Cayenne pepper
1 tbsp salt (pumpkin is very bland without salt)

1 7-ounce container Greek yogurt, for garnish

Instructions

Heat the oven to 400 degrees. Place the pumpkin pieces rind-side up in a baking pan with a lip; pour in a bit of water around the pieces. Bake 30-45 minutes, or until tender. Turn on the broiler and place the pumpkin pieces pulp-side up under the broiler. Cook 5-10 minutes, or until the pieces are well browned.

Set the pumpkin aside to cool.

In a large pot, heat the oil, then saute the onions until slightly brown. Add the garlic and saute until tender. Scrape the pulp from the pumpkin and place in a blender or food processor. Process in batches until smooth, unless you like a bit of texture in your soup. 

In the same stockpot, heat the broth and coconut milk until bubbly. Add the rest of the ingredients except the yogurt, and stir well. Heat to a boil, reduce heat, then cook for 10 minutes. Taste and correct seasonings.

Serve with a spoonful of yogurt on top of each bowl. Don't forget the Cheddar Biscuits!

Serves 4-6.

Read more...

Baked Trout on a Bed of Potatoes

>> Friday, October 17, 2014


Baked Trout on a Bed of Potatoes

When I was growing up, I went fishing with my dad quite a bit. We fished from the shore and from boats, and by the end of the season we were all a little tired of fresh fish.

I had forgotten how amazing fresh fish tastes.

Joe went out on a charter boat with some friends last month, and caught the second largest fish in the photo down there. Thankfully, they cleaned the fish there and he brought home lake trout and salmon fillets for us. We made this Northern Italian dish that night.


Charter boat fishing on Lake Michigan


Fresh fish on a bed of thinly-sliced broiled potatoes sounds simple, and it is. It is right in line with Italian traditions of cooking: use the very freshest, tastiest ingredients, cook them simply and season them judiciously, and let those simple flavors shine.

Along with fresh fish, we had a pound of new red potatoes from my parents' farm. This is a great time of year to pick up new potatoes, and they taste the best they will all year.

Happy Fish Friday!

Ingredients

2 cloves of garlic, minced
1 lb new red or yellow potatoes, thinly sliced (peel if you prefer)
Salt and pepper to taste
3 tbsp olive oil
1 tbsp chopped fresh parsley
2 sprigs of fresh rosemary (about 2 tsp chopped)
1 lb fresh lake trout or other freshwater fish

Preheat the oven to 375 degrees. Finely chop half of the rosemary, then combine with the chopped parsley, minced garlic, salt, and pepper.

Grease a large baking pan. Spread half of the potatoes on the bottom, and drizzle with a third of the oil. Sprinkle with part of the rosemary-garlic mixture. Add a second layer of potatoes, oil, and herb mixture.

Cover the dish with foil and bake for 20 minutes. Uncover and bake until the potatoes are nearly tender.

Baked Trout on a Bed of Potatoes


Place the fish fillets on top of the potatoes, then sprinkle with the remaining oil and herb mixture. Place the remaining rosemary sprig on top. (Note: I am a little sensitive to the strength of rosemary, so the sprigs shown on top are fresh thyme).

Bake until the fish is opaque and flakes easily with a fork, about 10-15 minutes. Serve immediately.

Serves 4.

Read more...

Johnny Appleseed Rum Punch

>> Thursday, October 9, 2014


Growing up in Southwestern Michigan, fall was one of the busiest times of the year. There were plenty of fruit orchards around us, and U-Pick apple orchards got plenty of business. We always went down the road to Jollay Orchards in Coloma, where if you wanted, they cranked your apples into cider. I can still remember how sweet and pungent the cider mill smelled.

As soon as the temps dip below 60s, heat up this punch and pour it into a thermos for tailgating, hayrides, or bonfires. It'll keep you warm and happy all night.

You can add more or less rum to taste, or skip the rum altogether if you prefer.

Prosit!

Ingredients

1 gallon apple cider
2 cups water
1/3 cup clover honey
1 tbsp ground cinnamon
1 1/2 tsp ground cloves
2 cups dark rum

Directions

Stir together all ingredients except the rum. Heat to a boil, reduce heat, and simmer 5 minutes. Stir in rum before serving. Don't burn your mouth!

Makes about 1 1/2 gallons.


Read more...

Cornbread with Sweet Green Chiles

>> Friday, October 3, 2014


Simple, filling comfort food...that's what we call these cornbread squares! We've tried many cornbread recipes, but this is one of the most moist and flavorful versions we've come up with yet. Stick around to see some of our other cornbread recipes, too.

This is really good with Polish Mushroom Barley soup or Joe's Award-Winning Chili.

Ingredients

1 cup corn meal (we like to use the medium-coarse kind)
1 cup flour
1 tbsp sugar
2 tsp baking powder
1 tsp baking soda
1 tsp salt
3 tbsp butter, melted
3 tbsp olive oil
2 eggs, beaten, or 1/2 cup egg substitute
1 1/2 cups milk
1 tbsp lemon juice
1 5-oz can mild or hot green chilies

Directions

Preheat oven to 425 degrees.

In a large mixing bowl, stir together the corn meal, flour, sugar, baking powder, soda, and salt. In another bowl, stir together the butter, oil, eggs, milk, and lemon juice. Pour the liquid into the flour mixture and stir until the mixed, but still a little lumpy. Stir in the can of chilies.

Grease a 9x12 baking pan. Pour the batter into the pan. Bake at 425 degrees for 20-25 minutes, until slightly browned and a toothpick inserted in the center comes out clean. Cool slightly before cutting into squares.


Read more...

Skinny Chicken Caesar Salad

>> Monday, September 29, 2014


Skinny chicken caesar salad


We didn't eat as many healthy foods as we wanted to this summer. Sadly, it was a summer of drive-through lunches and meetings in restaurants with way too much temptation. I think it's safe to say this was a summer spent on the run.

Luckily, we have very health conscious friends who help us be our best selves, not our most self-indulgent selves.When we arranged for a picnic at Ravinia, an outdoor concert venue north of Chicago, Joe tossed up this tried-and-true light Caesar salad that he's been making for years. It's unbelievable quick and tasty.


Wine, fruit, and salad were all we needed to round out an evening under the stars, listening to Crosby, Stills, and Nash, and finally sitting back to relax.

Ingredients

For the Dressing

¼ cup fat-free egg substitute

1/4 cup low-fat mayonnaise

2 tbsp Dijon mustard

3 tbsp cider vinegar

1 tbsp olive oil

1 tsp anchovy paste or Asian fish sauce

2 tsp Worcestershire sauce

1 small clove garlic, minced

1 tsp ground black pepper

3 cups cooked chicken (for this evening, Joe picked up a rotisserie chicken from the grocery store; usually we make this with leftover chicken or roast chicken breast)

1 large head romaine lettuce, torn into bite-size pieces

1 1/2 cups nonfat croutons

¼ cup grated Parmesan cheese


Instructions

Blend the dressing ingredients in a blender or food processor until smooth. 

Place the lettuce in a bowl and pour the dressing over it. Add the chicken, croutons, and cheese and toss until well combined.

Note: because we were picnicking at the concert, we brought the dressing and salad ingredients in different containers and mixed it together at the park.

Serves 4.

Skinny chicken caesar salad


Read more...

Peruvian Potatoes with Cheese Sauce (Papas a la Huacaina)

>> Sunday, September 21, 2014

Papas a la Huacaina

What a whirlwind summer we've had! Though our recipe posts have become farther apart, and stopped altogether for a month, don't think for a minute that we have fallen out of love with food. In fact, we've tested enough new recipes to stock the next year. 

In between my librarian work and marketing work for the local chamber of commerce, I've also been experimenting with art. Joe's been experimenting with having man friends and leisure time, something he hasn't allowed himself in quite a while. When you're raising kids, you don't have much spare time.

But now we've gotten to the lovely part of life where our children are our friends and we have much more time to cultivate our interests. And that's where this recipe comes in. To celebrate Joe's birthday, First Born found a Peruvian restaurant on the north side of Chicago, Ay Ay Picante (4569 N Elston Ave)None of us had tried Peruvian food before, but we learned their cuisine has a strong Asian influence and the backbone of their traditional recipes are seafood and potatoes.

I have become addicted to these potatoes. It's a surprising change on traditional potato salad, or a warm and comforting dish that is hearty enough for a main meal. The luscious sauce is what makes this dish so alluring. It is the authentic version of that orange cheese sauce they put on nachos. It's what nacho cheese sauce wants to be when it grows up.

I bet we could find a dozen other uses for the cheese sauce, but for now, we'll just pour it generously over the papas.


Ingredients

For the Sauce
 1 Pound of queso fresco (fresh farmer's cheese)
 Dash of Salt and Pepper
1 poblano pepper or large banana pepper, seeded
1 yellow bell pepper, seeded (note: you can use all banana or poblano peppers if you like it very hot)
1 can of evaporated milk
1 cup crumbled saltine crackers (about 15 crackers)

For the Potatoes
6 large red potatoes 
1/3 cup pitted Kalamata olives, cut in half
Lettuce leaves
4 eggs
2 tbsp snipped chives or green onions

Directions:

Boil the potatoes and eggs together until the potatoes are tender. Allow to cool. Peel the potatoes and eggs and cut into slices. If you will be serving the dish cold, chill the potatoes and eggs until ready to serve; otherwise, leave at room temperature.

Put all the sauce ingredients in a blender or food processor, and blend until thick and smooth. Pour into a saucepan and slowly heat up the sauce until it starts to bubble, stirring constantly. 

If you are serving the dish cold, allow the sauce to cool to room temperature before assembling. Otherwise, lay down a bed of lettuce and arrange the potatoes on top. Pour the sauce over the potatoes, then garnish with the chives, olives, and eggs.

Serves 4 as a main meal.

Read more...

Eunice's Carrot-Banana Bread

>> Wednesday, August 6, 2014


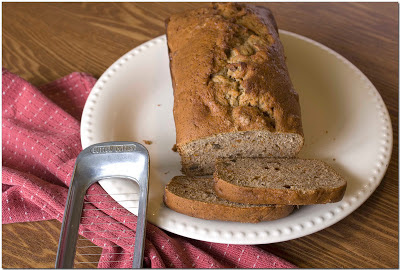
Eunice's Banana-Carrot Bread


I had the most wonderful mother-in-law ever. Eunice was a sweet lady who grew up in the early 1900s and spent most of her life on cattle ranches and in church charity guilds. I see her thoughtful, kind, good-hearted traits in Joe. I just wish I'd met her (and Joe) sooner.

Eunice spent her retirement serving other people and making them happy. In her late eighties, she'd still go to the Senior Center nearly every day to serve those "old" seventy and eighty-year-olds. When she passed away the day after Mother's Day a few years ago, her funeral was swamped with people from all over the U.S. who had loved her. She truly showed a life well lived.

Eunice and Joe Duea
Joe and his mother Eunice at her 90th birthday party

The first time we traveled to Clear Lake, Iowa to meet her, she made a big loaf of this moist and dense banana-carrot bread for me and the girls. I think Joe got some too, but we might have eaten it all without him. She was so happy that I loved it that every time she knew she was going to see me, she would make a couple of extra loaves of bread for me to take home.

When Joe and I were engaged, I gave Eunice a blank cookbook and asked her to write down some of her favorite recipes and maybe some of Joe's long-time favorites. Her banana-carrot bread is the first one in the "breads" section. I love it that I have this recipe written in her handwriting.


I'm a little teary right now.

Last weekend my parents came to visit, to take me out for my birthday and to take the family to a Cubs game as our Christmas present from last year. I made a double batch of the quick bread batter to make a loaf for breakfast and muffins for Jessie and Erich, since they're working through finals week. The bread tasted just as moist and delicious as when Eunice used to make it.

Ingredients

1/2 cup vegetable oil
1/3 cup white sugar
1/2 cup brown sugar
2 eggs (or 1/2 cup egg whites)
2 cups flour
1 tsp baking soda
1/2 tsp salt
1/2 tsp cinnamon
1/4 tsp nutmeg
1 cup mashed ripe bananas (about 2 or 3)
1 cup grated carrots
1/2 cup chopped walnuts or pecans

Directions

Preheat the oven to 350 degrees and oil a 9x5 loaf pan (or a 12-cup muffin pan)

In a mixing bowl, combine oil and sugar. Add eggs; mix well. Stir together flour, soda, salt, cinnamon and nutmeg. Gradually blend into the creamed mixture alternately with the mashed bananas. Stir in carrots and nuts. 

Bake at 350 degrees for 55 minutes (for loaf pan) or 25-30 minutes (for muffins), until a toothpick inserted in the middle comes out clean. Cool 10 minutes before removing from the pan.

Makes 1 loaf or 12 muffins.

Read more...

Elote Dip (Creamy Mexican Corn Dip)

>> Wednesday, July 23, 2014


Elote Dip (Creamy Mexican Corn Dip)


In Pilsen, the Latino neighborhood near the University of Illinois at Chicago, I would often see men pushing compact food carts in spring and summer, or riding bicycle carts and ringing little bells as they passed. The vendors sell all kinds of treats - ice cream, fruit cups, quick tacos, or elote - corn with mayonnaise, cheese, and a bit of spice. Some vendors sell elote as whole ears of corn with a skewer for you to hold onto while you munch. At a Hispanic grocery store near us, a lady sells little cups of cut corn mixed with the creamy elote sauce. Jessie and Jenn used to love to dip into them with tiny plastic spoons while we examined the produce.


pushcart vendor making fruit cups  in Rogers Park, Chicago


Of course, one of the many wonderful things about corn on the cob is that it gives you an extra incentive to floss your teeth (which we're all doing 12 times a day already, right?). But as a dip with tortilla chips, elote has the benefit of very little cleanup afterward.

When my sister and nephew stopped over last week on the way to the National Dive Meet in Minneapolis, I warned them that this dip has no real nutritional value...but that was a lie. Everyone knows that corn is good for you, and corn and cheese eaten with corn chips are especially healthy. Anyway, once you taste this dip you might not care about nutrition, which is why we lightened it up with low-fat dairy ingredients and light corn chips.

Elote Dip (Creamy Mexican Corn Dip)

Ingredients

6 ears of corn in husks
1 cup light mayonnaise
1 tbsp Mexican-style hot sauce
2 tbsp lime juice
1/3 cup Cotija or Parmesan cheese, finely grated
1 tbsp cilantro, chopped (optional)
1 tsp ground cayenne pepper (optional)
1 bag of tortilla chips

Directions

Soak the ears of corn in water for 10 minutes, while heating the grill to medium temperature. Grill the corn, turning occasionally, for 15-20 minutes, until just tender. Allow to cool slightly then husk the corn, and cut the kernels off the cobs.

In a medium saucepan, stir together the corn, mayo, yogurt, hot sauce, lime juice, salt and pepper, and cheese. Heat until bubbly. Serve hot, garnished with the cilantro and cayenne.

Makes about 3 cups of dip.

Read more...

Wild Berry Lavender Jam

>> Tuesday, July 15, 2014


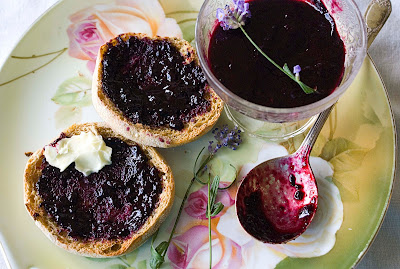
blueberry and blackberry jam with lavender


Last weekend when Joe and I went for a walk in the woods, we found wild blackberry vines studded with fresh berries. I'd been out the week before collecting wildflowers, and I expected the berries would be ready soon. This time, I came to the nature preserve with a couple of plastic bags to bring home the fruit.


Wildflowers from the nature preserve - colored pencil drawing.


Thankfully, we were coated with a strong layer of insect repellent. The mosquitoes are fierce and heavy this summer; in some thickets we could hardly breathe through the fog of flying bugs. Nonetheless, the berries were delicious and worth the threat to life and limb.

Those we didn't eat immediately we stirred together with some blueberries and made this fragrant, floral-tinged jam.

Wild berry lavender jam


Ingredients

Juice of three limes (about 1/2 cup)
1/3 cup hot water
2 tsp powdered pectin
3 tablespoons lavender buds and leaves
4 cups fresh blackberries
4 cups fresh blueberries
4 cups sugar

Directions

In a large non-reactive saucepan, stir together the water, lime juice, and pectin.

Put the lavender, berries, and sugar in a blender or food processor and pulse until mixed but still slightly lumpy. Add to the saucepan and mix well. Bring the jam to a boil, reduce heat, and simmer on low, stirring frequently, for 15 minutes.

Check to see if the jam is setting by dropping a bit onto a plate and letting it cool for a few minutes. The jam is set when you can tilt the plate sideways and the jam does not slide off the plate.

Sterilize half-pint jars and lids. Heat water in a boiling-water canner until it is at a rolling boil. If you don't like seeds, strain the jam through cheesecloth before putting it in jars. Then fill sterilized jars with the fruit mixture, leaving 1/2" room from the rim. Wipe off the rims and screw down the lids until finger-tight.

Boil in a hot-water bath for 15 minutes. Remove from boiler and cool on a towel. Tighten the lids before storing.

Makes about 8 half pint jars.

The Complete Guide to Food Preservation
You can find other canning and preserving recipes in my book, The Complete Guide to Food Preservation: Step-by-step Instructions on How to Freeze, Dry, Can, and Preserve Food

Read more...

Cranberry-Chicken Pasta Salad with Poppyseed Dressing

>> Wednesday, July 2, 2014


Cranberry-Chicken Pasta Salad with Poppyseed Dressing


We love a good pasta salad. In fact, we love pasta in general. This recipe is a quick one, which is helpful on a weeknight or when you're running late to a picnic and you promised to bring a salad. Not that it would ever happen to you, but I'm a little surprised at how often we're rushing to fix something for a party.

On the other hand, if you have plenty of time to make this, I'd recommend starting with steaming or boiling a large boneless skinless chicken breast rather than using canned chicken meat. I'd also suggest toasting the pecan nuts in a dry skillet over medium heat for about 10 minutes before stirring them into the pasta salad. These extra steps really punch up the flavor.

Creamy poppyseed dressing is really easy to make, too, and brings out the sweet tangy flavor of the cranberries. Altogether delicious.


Creamy poppyseed dressing

Ingredients

For the Dressing

1 cup mayonnaise
1 tbsp milk
1/4 cup sugar
1/4 cup white onion
1/4 cup apple cider vinegar
1 tsp garlic powder
1 tsp ground mustard
2 tsp black poppy seeds

For the Salad

1 16 oz box farfalle, elbow, penne, or campanelle pasta (any sort of small shape) 
2 cooked chicken breasts, or 2 5-oz cans cooked chicken 
1 cup chopped celery 
2/3 cup chopped carrot 
2/3 cup chopped white onion 
2/3 cup chopped cucumber 
1/2 cup chopped bell pepper 
1/2 cup dried cranberries 
1 cup pecan pieces, toasted
Romaine lettuce, for serving

Directions


Blend together all ingredients except the poppy seeds. Stir in the poppy seeds and chill the dressing until the salad is ready.

Cook pasta according to directions, then drain and rinse with cold water. Cut the chicken into bite-sized pieces. Stir in the rest of the ingredients and drizzle with the dressing. Mix until well combined. Serve over lettuce leaves.

Makes about 6 main-dish servings, or 8-10 side dish servings.

Read more...
Turkey Cordon Bleu Casserole

>> Wednesday, June 25, 2014


Turkey Cordon Bleu Casserole


This casserole recipe from my sister-in-law Carolyn is so quick and easy that it's perfect for using up leftover turkey and for feeding holiday houseguests. Why spend all your time in the kitchen, when there's so much fun to be had? It's so delicious that people will forget they're eating leftovers.

This is also perfect for feeding a crowd any time of year. In Iowa, where Carolyn lives, this is a staple on buffets and church hot-dish suppers. The recipe can easily be scaled up for large groups. Substitute chicken if you don't have any turkey.

Ingredients

2 cups plain croutons
2 cups turkey, cubed
2 cups ham, cubed
2 c. grated Swiss cheese
1 can cream of chicken soup (we like the low-fat, low-sodium kind)
1 c. water
1 cup finely crushed bread crumbs
salt and pepper to taste

Directions

Butter a 2 quart casserole dish. Spread the croutons on the bottom. Add half of the turkey and ham cubes. Sprinkle half of the cheese over the meat. Then pour half of the chicken soup/water mixture over. Repeat meat, cheese, soup mixture.

Sprinkle bread crumbs on top and season with salt and pepper. Bake, covered at 350 degrees for 40 minutes.

Read more...

Med-Mex Roasted Red Pepper Hummus

>> Wednesday, June 18, 2014


Med-Mex Roasted Red Pepper Hummus


When I was nineteen, I married a Mexican man and moved in with his mother so we could save for a house. Mama Nona tried to teach me how to cook traditional Mexican food, but it was pretty difficult because I didn't know much Spanish, and if she knew any English beyond "hello" and "goodbye", she didn't let on to me.

Mama Nona was not impressed with my cooking skills. One day she had a pot of pinto beans boiling on the stove. Her daughter Graciela shouted up to me. “We’re going out, Angela. Can you watch the beans?”

I came downstairs to look. “Sure, no problem.”

Mama Nona was muttering to herself.

“What did she say?”

“She says you’re going to burn the beans.”

“I’m not going to burn the beans. I got this.”

I was halfway into the HBO premiere of “Saint Elmo’s Fire” when I smelled them burning. I ran downstairs but there was nothing I could do. They were stuck to the bottom of the pot and steaming rancid smoke at me. I dumped them into the trash bag, took it out to the trash bin and started a new batch boiling. I opened all the windows to let the snow-fresh air come in.

Several hours later, when the family came home, the beans were perfectly done. I smiled at Mama Nona while she tasted them. She laughed.

"What?"

“She says, 'I told you that you were going to burn the beans.',” said Graciela.

Last night I was cooking garbanzo beans (chick peas) from scratch so that I could make hummus. To cook most dried beans, you start them the night before by sorting out the bad ones, putting them in a pot of water, adding a couple pinches of baking soda and heating them. Once they reach a boil you turn off the stove and cover them, and let them sit on the burner overnight. The next day you strain and rinse them, cover with water again and let them simmer until they are soft. Doing it this way allows the beans the rehydrate and also eliminates the stuff that makes us gassy.

Well.

I was happily simmering those garbanzos that I'd already spent time with the night before. Unfortunately, Joe and I were also making a new recipe for duck in a pumpkin-seed sauce, and baking some french bread. I forgot about the garbanzos until we smelled the smoke.

And then Mama Nona rolled over in her grave, because her hopeless ex-daughter-in-law still can't cook a pot of beans.

I aired them out on the deck because the smell of burning beans is foul. Then I picked them over, because I still wanted hummus, darn it! So I took out a container of pinto beans that I had managed to cook properly and continued on with the recipe, making a Mediterranean-Mexican hummus fusion.

What I love about this recipe is that it has a much smoother, creamier texture than garbanzos alone, which can be a little mealy and grainy. We also kicked up the heat. Cumin, sesame, chick peas, beans, and peppers are common ingredients around the entire equator, so I say this is a valid food fusion. Let me know what you think of our innovation. Out of mistakes come good things.

Ingredients

1 jalapeno (or more to taste)
1 medium red bell pepper
1/3 cup olive oil
1 medium yellow onion
3 garlic cloves
2 cups cooked garbanzos (chick peas)
2 cups cooked pinto beans
1/3 cup fresh flat-leaf parsley
2 tsp cumin
1 tablespoon sesame oil
Salt and pepper to taste

Directions

Place the peppers on a broiling rack and place them under the broiler at high heat. Turn frequently, until the skins are blackened evenly on all sides. Place the peppers in a paper bag and put a plate underneath it to catch the juices. Allow the peppers to steam at least 15 minutes, or wait until they are cool.

Chop the onion. Saute it in 2 tbsp olive oil in a frying pan until soft. Mince the garlic and add it to the frying pan. Add the beans and 1 cup of water. Bring to a boil, reduce heat, and simmer for 10 minutes.

Take the peppers out of the bag and remove the blackened skins. Scraping them with a knife is the way Joe likes to do this. Remove the seeds and dice the peppers. Add the peppers and the parsley to the blender.

Stir together the remaining olive oil, cumin, sesame oil, and salt and pepper. Pour into the blender. Process the bean mixture until smooth, scraping down the sides often. Add water as needed if the mixture is too thick; the consistency should be similar to creamy peanut butter. Taste and add salt and pepper as desired.

Serve the hummus in pocket pita bread with lettuce, cucumber, grated carrots, and extra parsley, or use as a veggie dip or sandwich spread.

Makes approximately 5 cups.

Read more...

Chicken Scallops in Mushroom Sauce

>> Wednesday, June 11, 2014


Chicken Supremes in Mushroom Sauce

Here's another elegant dish with so much bold flavor that you'll have trouble believing it's low fat and healthy. Using the French technique of cutting the chicken breasts in half and quickly sauteing them on each side leaves them exceptionally tender and juicy.

We spiked the mushroom sauce with a tiny bit of vermouth, and used beef broth instead of chicken for a heartier, mellower flavor. It's so easy to impress someone with this meal, and it's amazingly quick to make. We suggest you have everything prepped and beside the stove before you start cooking. It's that fast!

This is fantastic with steamed green beans and a nice tossed salad.

Ingredients

2 tsp fresh thyme, minced
2 tbsp vermouth or dry white wine
2 tsp Worcestershire sauce
1 1/2 cups fat free beef broth
1 tbsp oil
4 boneless, skinless chicken breasts
3 cups sliced white mushrooms
1 garlic clove, minced
2 tbsp cornstarch
2 tbsp water

Directions

Stir together the thyme, vermouth, Worcestershire sauce, and beef broth, and set it aside.

Lay a chicken breast on a cutting board and place your hand on top of it. Using a sharp knife, slice the breast through the middle from edge to edge, creating two thin fillets. Do the same with the remaining breasts.

Heat a large frying pan, then add the oil and swirl it around to coat the pan. Add half the breast fillets and saute on medium-high heat for 4 or 5 minutes, until the side is cooked but not browned. Flip them over and cook the other side. Remove them to a warm dish and cook the other half of the breast fillets. Keep them warm while going on to the next step.

Place the mushrooms in the pan and saute until they start to turn tender. Stir in the garlic. Return the chicken breasts to the pan. Pour the broth mixture over the breasts and gently stir it. Bring the sauce to a boil, then reduce the heat and let it simmer 5 minutes.

Stir together the cornstarch and water. Pour it slowly into the sauce, stirring constantly. Keep simmering and stirring until the sauce has become a thin gravy (about 3 to 5 minutes). Serve immediately.

Serves 4-6.

Each 3 oz. chicken scallop with 1/4 cup sauce has 4 grams of fat and approximately 250 calories.

Read more...

Skinny Apple Carrot Waldorf Salad

>> Wednesday, June 4, 2014


Skinny Apple Carrot Waldorf Salad


This light and healthy salad punches up the flavor of the classic Waldorf salad while cutting down on the fat. There's a good reason why Waldorf salad has been a favorite for over 100 years; the sweet, crunchy, and nutty tastes are so satisfying. You can assemble this in a few minutes, and kids love it.

Ingredients

2 Granny Smith apples, cored and chopped
3 carrots, peeled and cut into matchstick slices
2 stalks of celery, chopped
1/4 cup toasted walnuts (toasting brings out the maximum flavor in this small amount of nuts)
1/4 cup raisins

Dressing

1/4 cup fat-free mayonnaise
1 tbsp cider vinegar
1 tsp ground ginger

Directions

Stir together the salad ingredients. In a separate bowl, whisk together the dressing ingredients, then pour over the salad and toss well to coat. The salad tastes best if it chills for at least 30 minutes before serving.

Read more...

Pretzel Bread (and Rolls!)

>> Wednesday, May 28, 2014

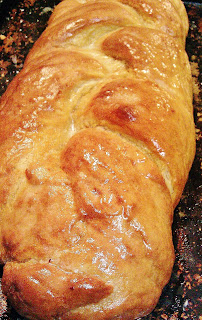
Pretzel Bread (and Rolls!)
My brother-in-law, Jim Calder, is a very methodical man. For years he has been working on making soft pretzels, mall-style. He was having trouble with the twisting part, so he decided to go on a fact-finding mission to the local pretzel shop and see how they did it. Once he saw these indifferent teens flipping the twist into the pretzels, he realized that anything he did would look fine.

Jim came up with a recipe for bread that can also be used to make rolls or buns for burgers, sandwiches, or whatever. In my opinion, this tastes best the day you bake it. By the way, if you'd like some great soup ideas to go along with this bread, just click on the "Soup" link to the right.

Ingredients

2 1/4 tsp dry yeast (1 .25-oz package)
2 tbsp brown sugar
1 tsp salt
1 1/2 cups warm water (110-115 degrees F)
4 cups all-purpose flour, plus 1/3 cup for kneading
1 1/2 tsp baking powder
2 cups warm water (110-115 degrees F)
2 tbsp baking soda
2 tbsp butter, melted
2 tbsp coarse sea salt or kosher salt

Directions

Pour warm water into a large mixing bowl. Stir in the brown sugar and salt, then stir in the yeast until dissolved. Allow the mixture to work for 15 minutes. Stir together the flour and baking powder, then stir it into the yeast mixture until well combined.

Sprinkle a kneading surface (a counter, a large cutting board, a table) with flour, and put the dough on the surface. Coat your hands with flour and knead the dough by folding it in half and pressing towards the center, until it is smooth and elastic and has lost some of its stickiness. This should take 5-10 minutes.

Place the dough in a large greased bowl, and turn it over to coat the surface. Cover with a damp towel and let it rise in a warm place for one hour.

Stir the baking soda into the warm water and pour it into a shallow pan. Grease a cookie sheet. Once the dough has risen, turn it out onto the floured kneading surface. Preheat the oven to 400 degrees.

If you are planning to make pretzel rolls, cut the dough into 6 pieces. Form each piece into a bun shape, then quickly dip it into the baking soda solution and place it on the baking sheet. Do the same with the rest of the pieces.

If you are making pretzel bread, cut the dough into 3 pieces. Roll each segment between your hands until you have made a rope of even thickness about 12-14 inches long. Dip the three pieces into the baking soda solution and lay them side-by-side in the cookie sheet. Pinch one of the ends together, then braid the ropes across to the the other side. Pinch that end together, too.

Bake the buns for 20-30 minutes, the bread for about 40 minutes. They are done when the crust is browned and has a slightly hollow sound when you knock on it. Brush with melted butter, and sprinkle with the coarse salt before serving.

Makes 1 loaf or 6 large pretzel buns.

Read more...
Related Posts Plugin for WordPress, Blogger...

  © Blogger template Simple n' Sweet by Ourblogtemplates.com 2009

Back to TOP